Halloween Crafts: Decorating with Candy Corn
Now that we’re officially in Halloween season, I can admit that I’ve been enjoying Halloween candy since the beginning of October. It’s impossible for me to resist! Fortunately, I’ve found some good uses for Halloween candy that don’t involve a big sugar crash afterward: Halloween crafts.
All you need to make these awesome Halloween decorations is a bag of candy corn and a few other supplies. They’re inexpensive and eye-catching, and really bring the spirit of Halloween to your house. Read on to learn how to make these Halloween crafts.
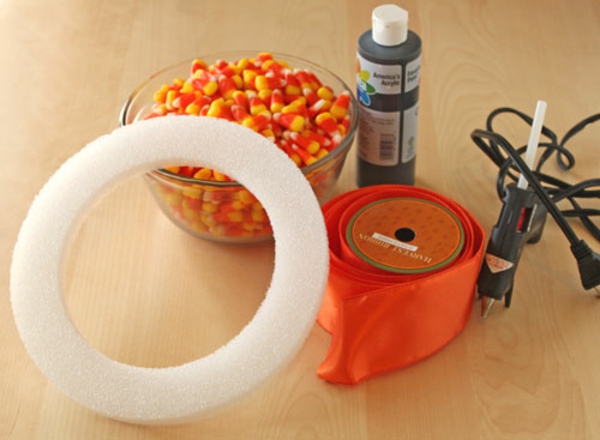
We’ll start with the Candy Corn Wreath. You need candy corn, of course–the exact amount will depend on the size of your wreath, but for a small 10″ wreath you can count on using about a pound and a half. You’ll also need a styrofoam wreath (available at craft stores), hot glue, black paint, and some ribbon. You could possibly use other types of craft glue, but I like hot glue because it hardens quickly so the candy corn wreath comes together in a flash.

Start by painting the wreath black. This step is technically optional, but I think the black background really makes the candy corn pop. You could also use black duct tape to wrap around the wreath, or black spray paint–I’m using regular black craft paint because that’s what I had on hand. After the wreath is painted, let it dry completely.
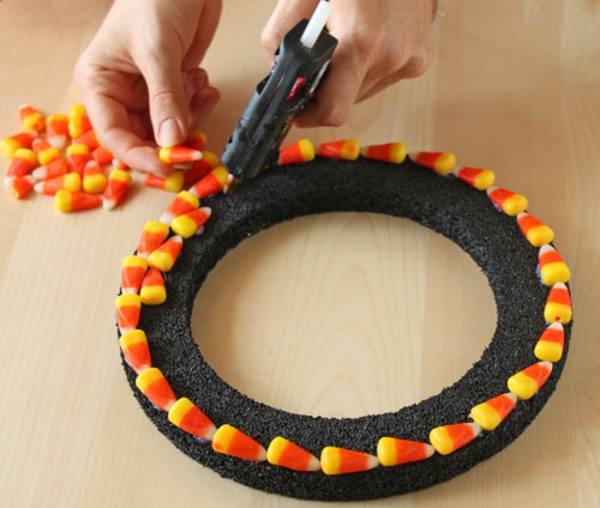
Start gluing the candy corn onto the outside of the wreath. You’ll want to spend a few minutes figuring out what arrangement works best–depending on the size of the wreath it might look better to have them all facing inward, or outward, or in concentric circles–you get the idea. I chose to have three layers of alternating candy corn going around my wreath.
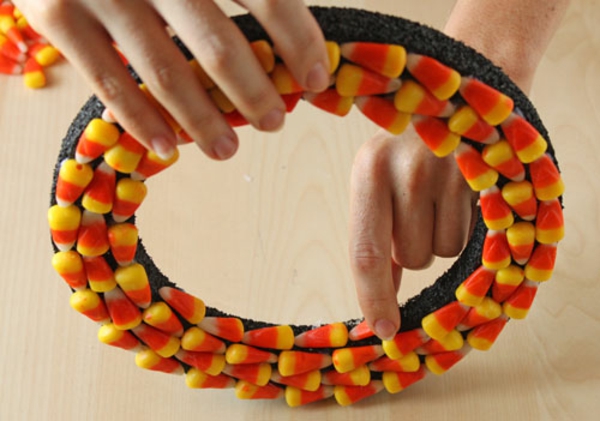
Once the outside is finished, glue a layer or two of candy corn to the inside ring of the wreath. I found it was easiest to hold it upright so the candy corn didn’t slide around while the glue was drying.
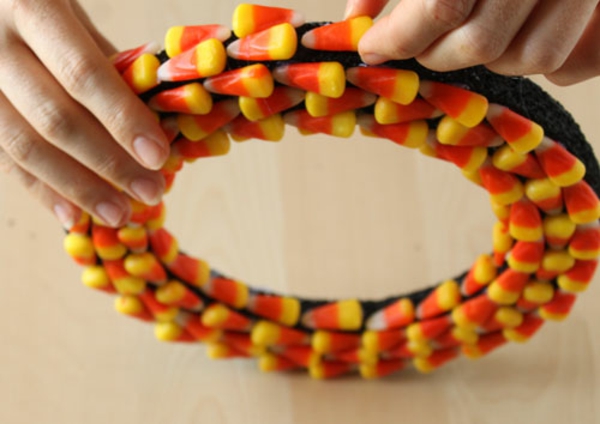
The outer edge of the wreath is the final surface to be finished. I glued two rings of candy corn to this edge so that when you look at the wreath from any angle, it looks covered with candy corn.
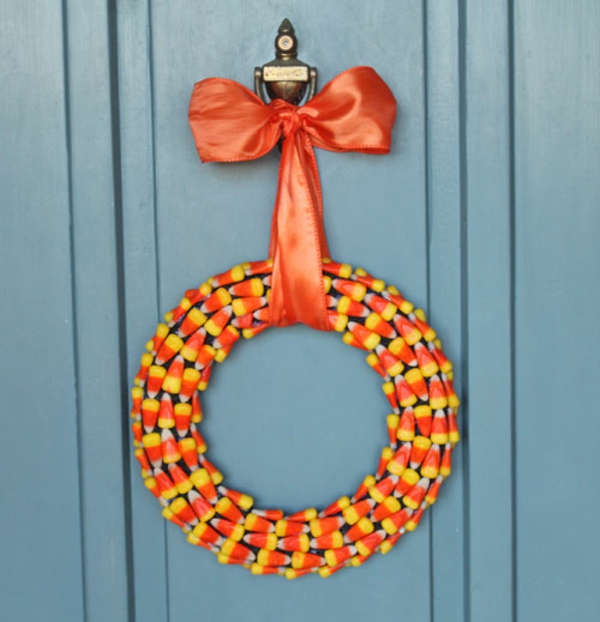
The last step is to loop a ribbon through the middle of the candy corn wreath and proudly display it! If you want to preserve your candy corn wreath and display it for many Halloweens to come, you can brush it with a clear sealant like Mod Podge, which should help keep it looking fresh.
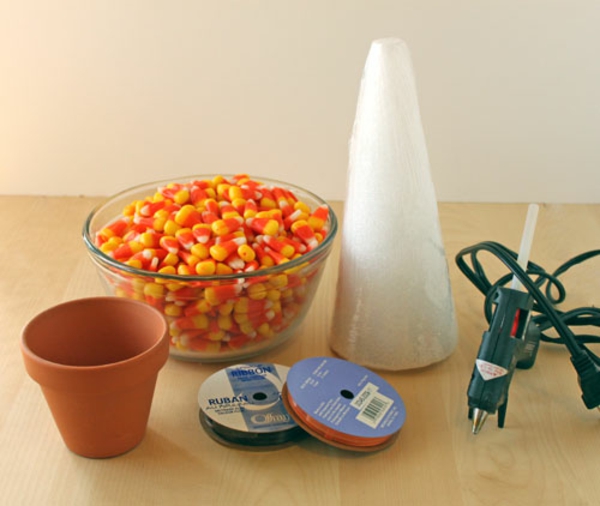
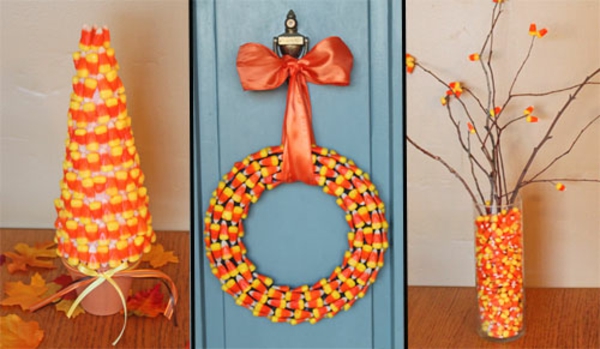
Making a candy corn tree is similar to a candy corn wreath. We’ll again need a styrofoam form, but this time you’ll want a cone shape. You’ll also need a small flowerpot (slightly smaller than the base of the cone), your trusty hot glue gun, and maybe some ribbons to jazz up the pot.
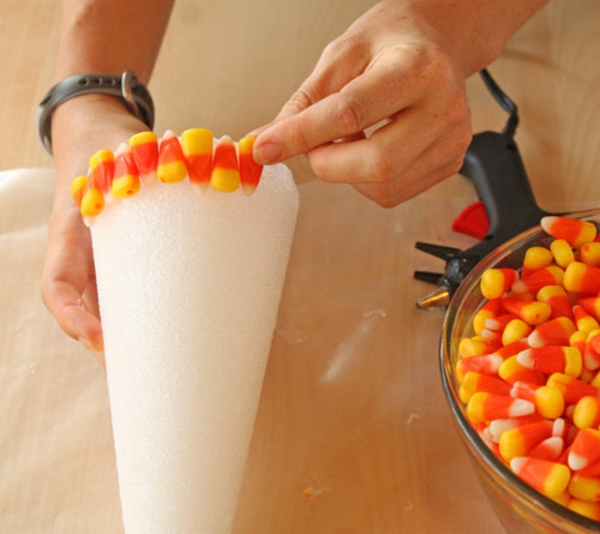
We’re again going to start by figuring out a pattern for our candy corns and gluing them onto the foam. You could paint the foam black, like we did for the wreath–black looks especially nice if your flowerpot is also black. I decided to leave mine white this time to make it look a little different from the wreath.
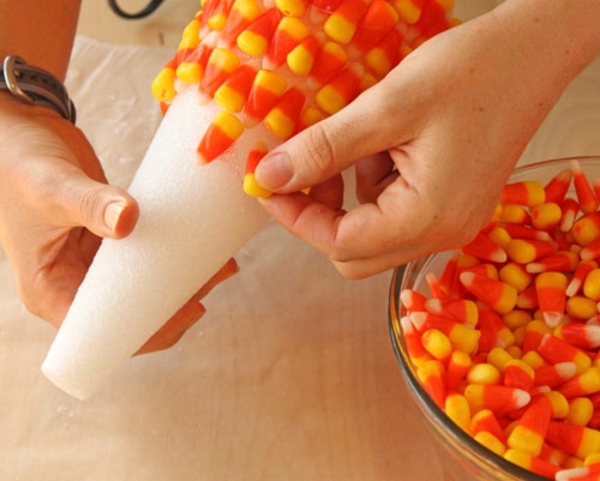
Glue the candy corn all the way up the foam cone until it is entirely covered. You could also add other Halloween candy onto the tree: packaged single-serving candies in Halloween colors look very nice, and different Halloween candies allow you to create other patterns and textures on the tree.
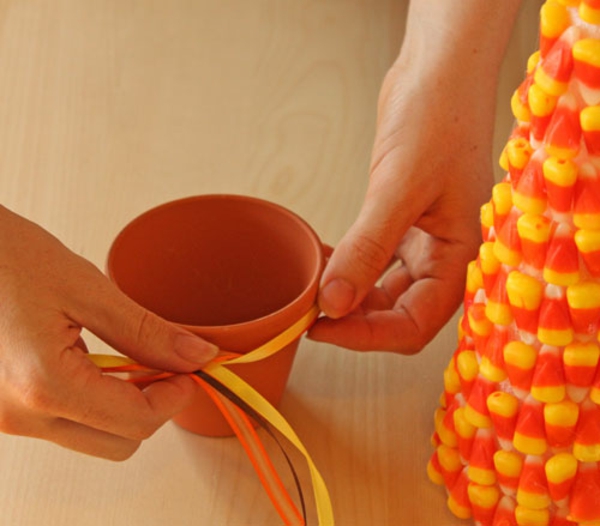
Once the tree is completely covered, decorate your flowerpot however you’d like. I’m going to tie some yellow, brown, and orange ribbon around it to match the candy corn colors.

The last step is to glue around the top of the flowerpot and firmly affix the bottom of the cone to the top of the pot.
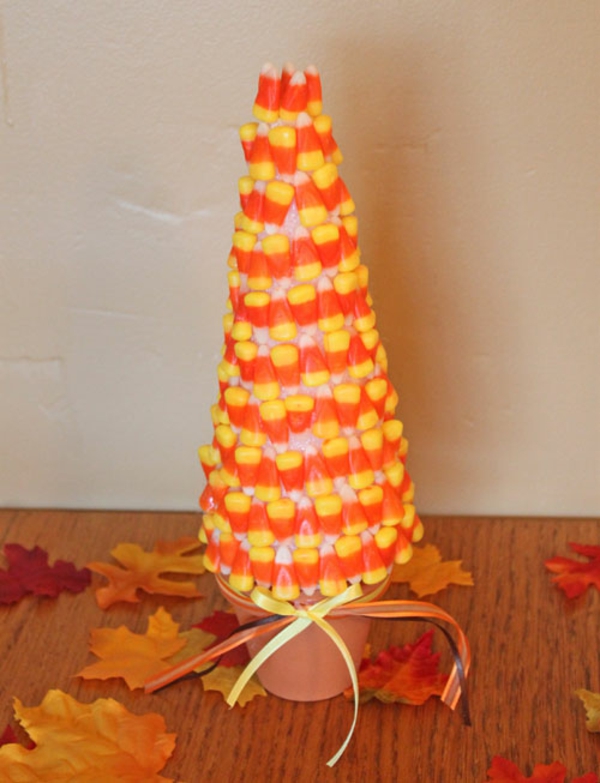
Now you have a great candy corn centerpiece! Just like the wreath, if you want to preserve it you can paint it with Mod Podge and it should last for years.
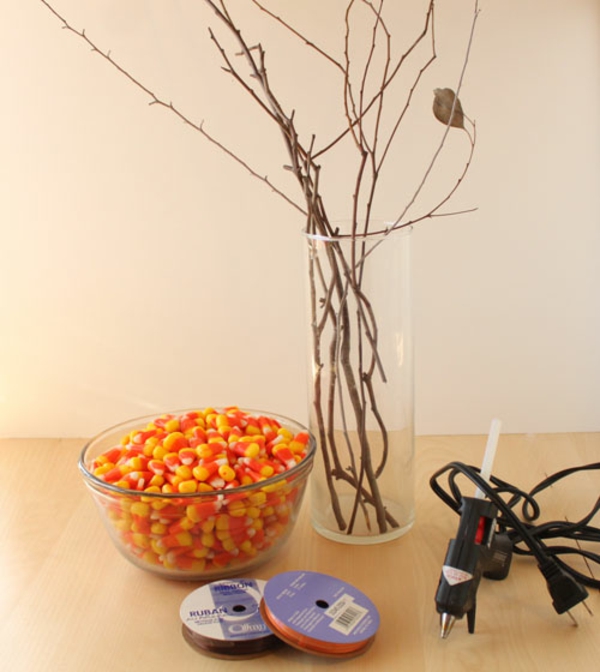
Last but not least, here’s a simple Halloween craft to make spooky candy corn branches. You’ll need candy corn (of course) and our friend the hot glue gun, as well as some sturdy branches and a vase or other container to keep them. The branches don’t have to be anything special–in fact, this is one of those crafts where the scragglier they look, the better!
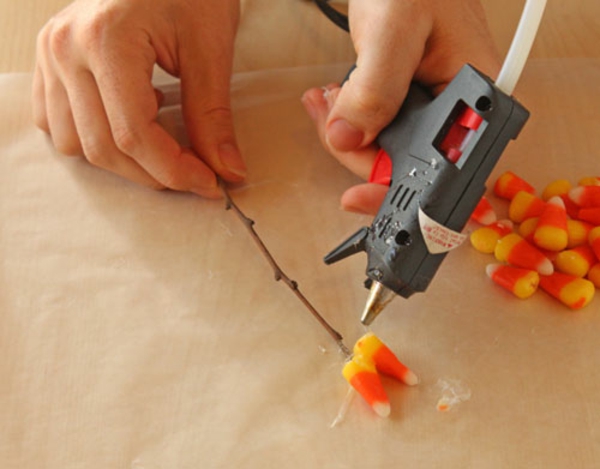
Glue one, or two, or three candy corns to the ends of the branches. When using multiple candies, I found it was easiest to glue the candies together first, and then once they were bonded, to glue the branch ends to the candies. Make sure your branch ends aren’t too thin, and can support the (surprisingly heavy) weight of a candy corn or two. Again, this Halloween craft is mean to be kind of ominous and spooky, so don’t worry about perfection.
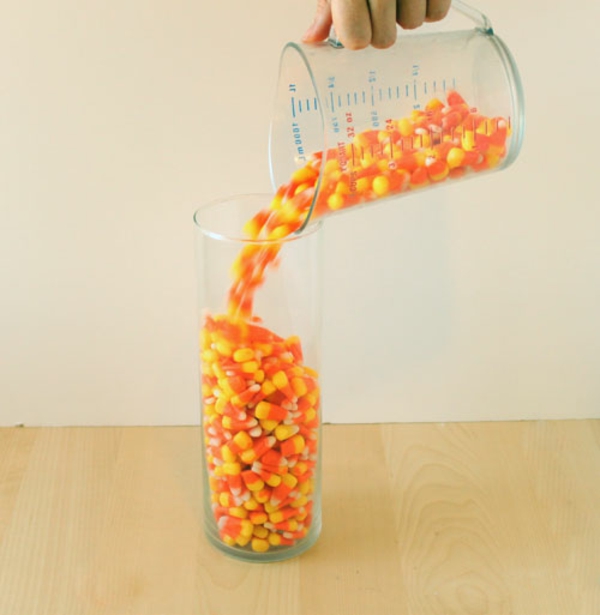
Since my container was clear, I decided to fill it with candy corn so that the bottoms of the branches weren’t visible. If your container is opaque you can skip this step. You could also put florist foam in the vase to help the branches stay in place. I found that the candy corn kept the branches from moving around very much in my vase.

Ta-da! Or should I say, boooo! (The final product looked so perfectly creepy, I had to photoshop the picture a bit to boost the scare factor.) I hope this has given you some ideas of all the things you can do with Halloween candy to make your home a spook-tacular place for Halloween!
All text and images (c) Elizabeth LaBau.