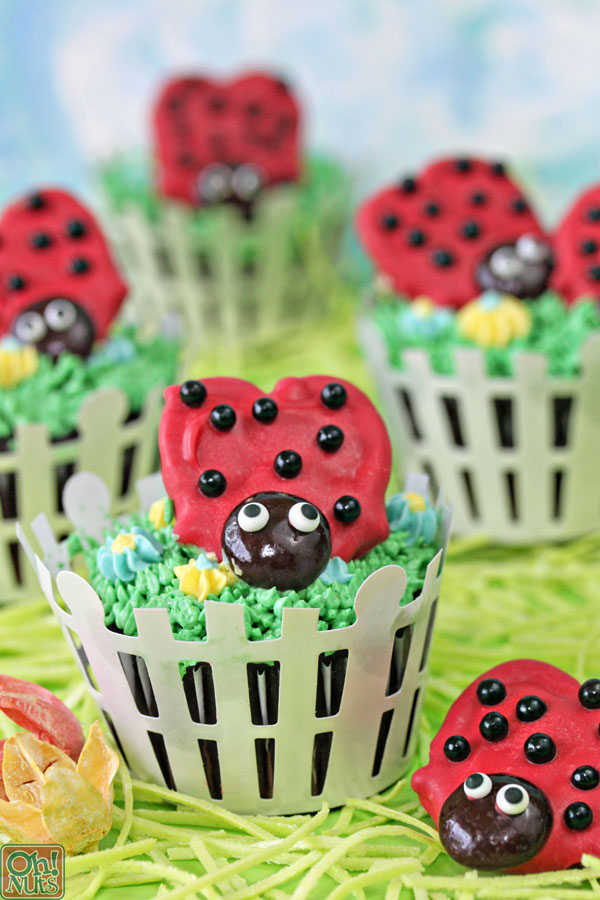
Pretzel Ladybugs
Prep time
Total time
These pretzel ladybugs are so cute and so easy! They're perfect for picnics or birthday parties, and they look adorable on top of cakes or cupcakes.
Author: Elizabeth
Serves: 24
Ingredients
- 9 oz (1½ cups) red melting chocolate wafers
- 24 mini twist pretzels
- 24 chocolate-covered peanuts or Junior Mints
- Black candy beads
- 48 small candy eyeballs
- Baked and cooled cupcakes
- Vanilla frosting tinted green, yellow, and blue
- Assorted piping bags and tips
Instructions
- Place the red melting wafers in a medium microwave-safe bowl and microwave in 30-second increments, stirring after every 30 seconds so the wafers don't overheat. Stir and heat until the wafers are melted and smooth.
- Cover a baking sheet with parchment paper or waxed paper. Use dipping tools or a fork to dip a mini pretzel into the red coating, then place it on the baking sheet. Repeat twice more, so you have 3 dipped pretzels—you'll want to work with just a few pretzels at a time, so the coating doesn't have a chance to set before they can be fully assembled.
- Use a spoon to pour a little melted coating into the center of each pretzel. Press a chocolate-covered peanut or Junior Mint on the bottom of the pretzels. Drop black candy beads onto the top of the pretzel's "wings." Finally, dip a toothpick into the bowl of coating and dab two dots of red onto the head. Press an eyeball onto each dot to firmly affix it. Once your three ladybugs are assembled this way, repeat with the rest of the pretzels until they've all been dipped and decorated.
- If you want to create grassy cupcakes to put your ladybugs on, fit a piping bag with a grass tip and fill it with green buttercream. Pipe grass on top of the cupcakes. Switch to a star tip and fill a bag with yellow or blue frosting, and pipe small star-shaped flowers across the grass. Finish up with a dot of contrasting buttercream in the center of the flowers.
- Place the pretzel ladybugs on the cupcakes and serve!
Recipe by Oh Nuts Blog at https://www.ohnuts.com/blog/pretzel-ladybugs/