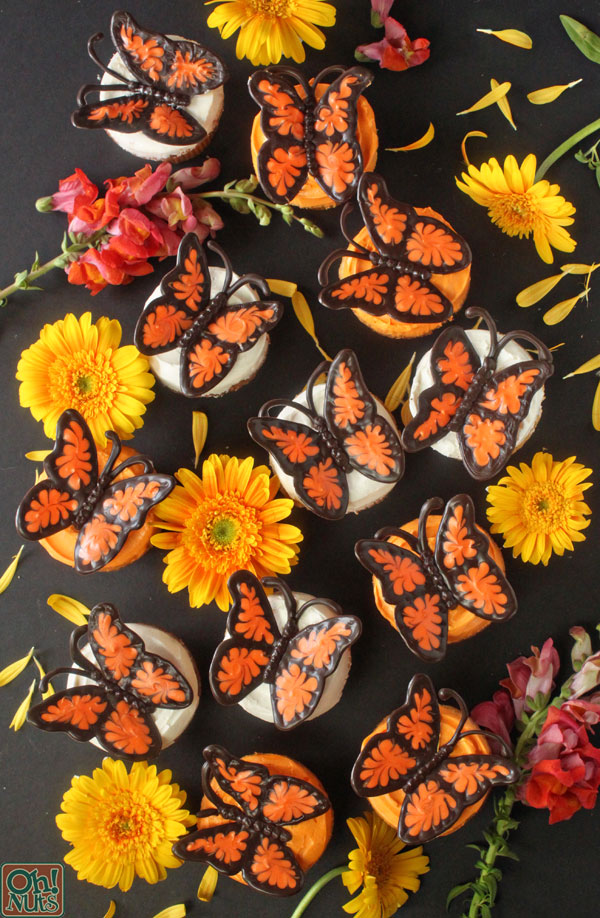
Chocolate Butterflies
Prep time
Total time
Serves: 24
Ingredients
- 12 oz (about 2 cups) brown melting milk chocolate wafers
- 12 oz (about 2 cups) orange melting chocolate wafers
- Toothpicks
- Butterfly wing and butterfly antenna templates
- 24 frosted cupcakes
Instructions
- Place the brown melting wafers and the orange melting wafers in separate medium bowls. Microwave them separately, stirring the wafers every 30 seconds to prevent them from overheating. Heat and stir until both colors are melted and smooth.
- Place the antenna template on your work surface, and tape a sheet of waxed paper over it. Transfer some of the melted brown coating to a piping bag fitted with a small round tip, a paper cone, or a plastic bag with a very small hole cut in the corner. Using the template as a guide, pipe chocolate antennae onto the waxed paper. Once you finish piping all the antennae on the page, shift the page over and do a second page—you will need at least 24, and since they are delicate, it's a good idea to make extra in case of breakage. Let them set completely before moving them.
- To make the wings, again tape a sheet of waxed paper over the butterfly wing template on your work surface. These wings work best when the coating is warm and fluid, so you will need to re-warm it occasionally in small bursts in the microwave, and work with 1 wing at a time. Start by outlining the wing in a thick layer of brown coating.
- Transfer some of the orange coating to a piping bag fitted with a small round tip, a paper cone, or a plastic bag with a very small hole cut in the corner. Fill in the center of the wings with the orange coating—don't worry about filling every single space, just a general coverage is fine.
- Use a toothpick to spread the coating to the edges of the wing, right up against the brown outline.
- Take that toothpick and drag it through the brown outline, into the orange, creating a swirled pattern. Repeat around the edges of the wing. Continue to make wings, warming the coating and refilling the bag as necessary, until you have made all the wings you need. It's a good idea to make extra wings in case of breakage. Once all of the wings are made, allow them to set completely.
- To assemble, stick the wings on top of the cupcakes at a slightly angle so that the outer edges lift up from the cupcake. Carefully stick an antenna in the top between the wings. Since they are delicate, I like to transfer them with a small spatula or knife instead of picking them up with my fingers.
- Finally, re-warm some chocolate coating, place it in a bag, and pipe a line or a series of dots in between the wings to make the butterfly's body.
Recipe by Oh Nuts Blog at https://www.ohnuts.com/blog/how-to-make-chocolate-butterflies/