White Chocolate Skulls for Halloween
Halloween isn’t the only big holiday celebrated this time of year–the beginning of November also brings Dia de los Muertos, or the Day of the Dead, a Mexican holiday that is now celebrated in many parts of the United States and other countries as well. I love the family-centric message behind the Day of the Dead, and the design nerd in me also loves the vibrant colors, exuberant patterns, and skull motif seen on many decorations.
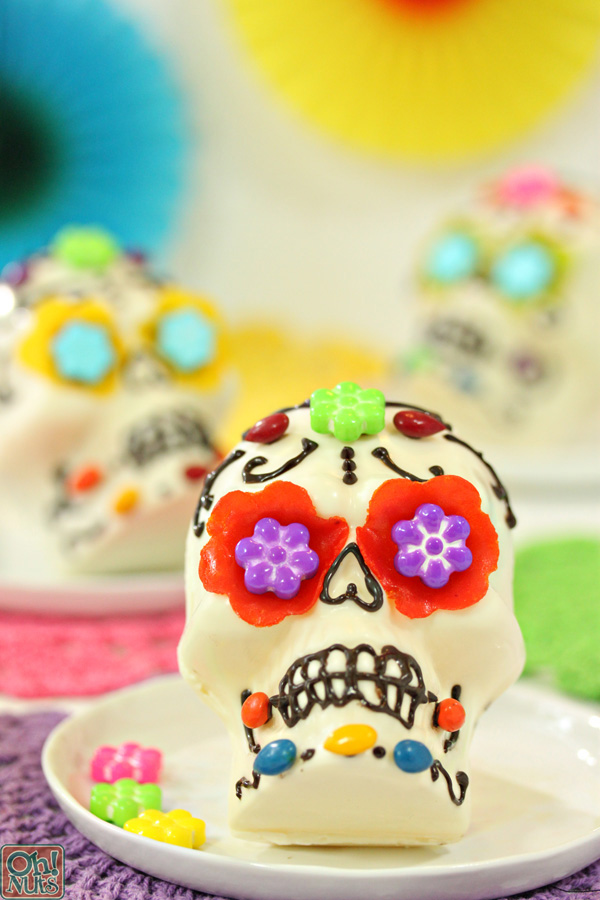
I wanted to get in on the Dia de los Muertos action this year, so I went on the hunt for a large 3-D skull mold for making sugar skulls or candy skulls. Although sugar skulls are the traditional choice, they’re not even meant to be edible, and let’s face it–that just wouldn’t fly with this blog!
So instead of making a sugar skull, I created hollow white chocolate skulls filled with candy. It’s sort of the Day of the Dead version of a pinata! On first glance the skulls might look like gorgeous centerpieces or decorations, but when you crack them open, you realize they’re entirely edible, and filled with MORE edible goodies. What’s not to love?
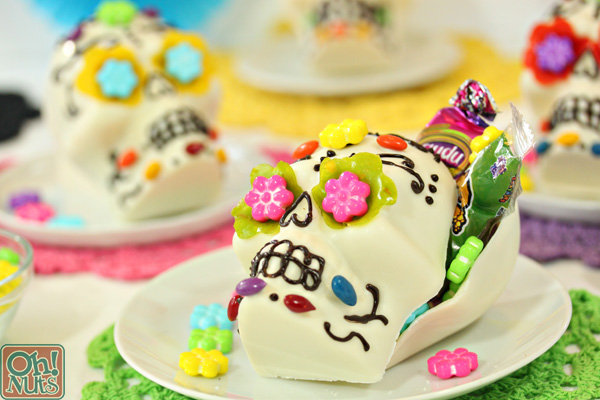
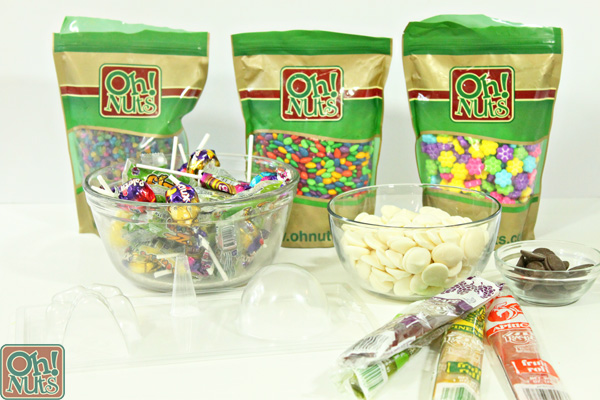
The best part of making these was getting creative with the decorations. I used fruit leather, flower candies, and chocolate-covered sunflower seeds to make the colorful designs on the skulls, but you can use your own favorite assortment of candy decorations. I recommend looking at photos of real sugar skulls to get inspiration for the skull designs. Ready to give it a try? Here’s what you’ll need to make these White Chocolate Skulls:
White Chocolate Candy Skulls
Yield: 4 skulls
Ingredients
- 1 lb white melting chocolate wafers
- 1 cup flower candies
- 1 cup multicolored chocolate covered sunflower seeds
- Several colors of fruit leather rolls (I used grape, green apple, pineapple, and apricot)
- 4 oz brown melting chocolate wafers
- Assorted candy to put inside
- Large 3D skull candy mold (I used this version from Wilton)
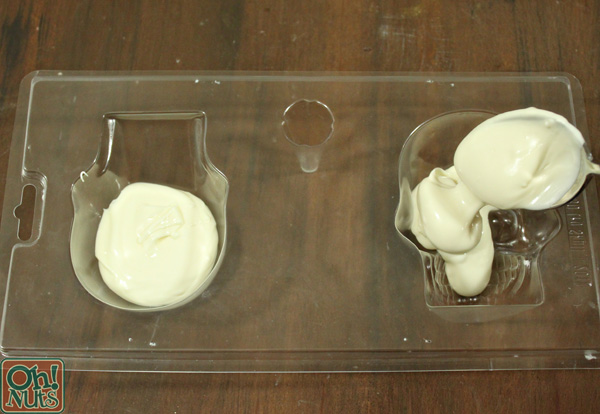
Place the white melting wafers in a large microwave-safe bowl. Microwave the coating in 30-second increments, stirring after every 30 seconds to prevent overheating. Continue to heat and stir until the coating is smooth and free of lumps.
Let the melted coating cool until it is no longer warm, but is still fluid. It should thicken a bit as it gets closer to room temperature. This will make it easier to get a good coating on the mold in one layer. When it is the right temperature, pour several generous spoonfuls of white coating into each cavity of a clean, dry 3D skull mold.
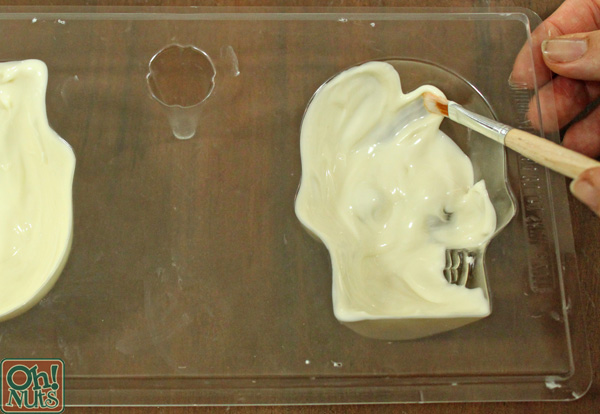
Use a clean paintbrush to paint the coating up the sides of the mold. Add more coating if necessary, working until you have a thick layer of white candy on the bottom and sides of each cavity.
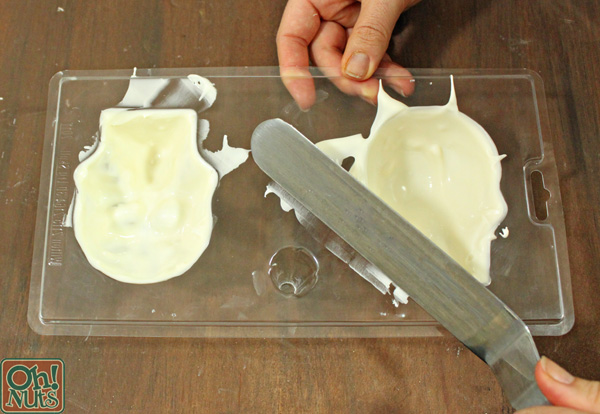
Run an offset spatula or knife around the top edges to remove any excess coating and make a clean line. Refrigerate the mold to set the coating completely, for about 20 minutes.
Once it’s set, evaluate the skull and see how the coating looks: if it looks thick and sturdy, it’s ready, but if it looks thin in spots, or almost translucent, add a second layer of white coating the same way you did the first. It’s better to be extra-careful and have a thick skull than to have a thin skull that easily cracks or breaks. After the second layer, refrigerate the candy mold again until the skull is completely set.
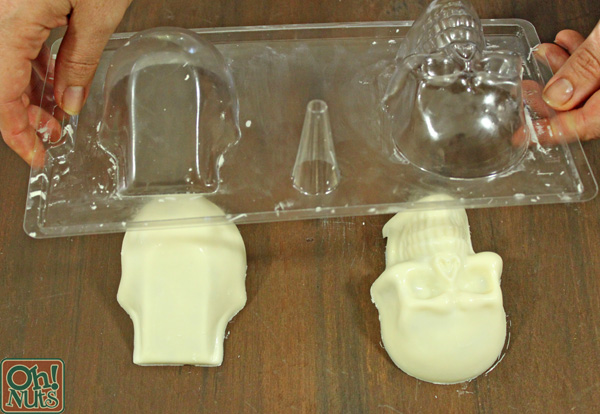
Once set, turn the mold upside-down and gently twist it to pop the skull pieces out. If it’s cold and set, they should pop right out. If you have trouble, don’t force it—instead put the mold in the freezer for 1-2 minutes, then try again. Repeat the skull-making process 3 more times until you’ve made 8 pieces total. You should have 4 front skull pieces, and 4 back skull pieces.
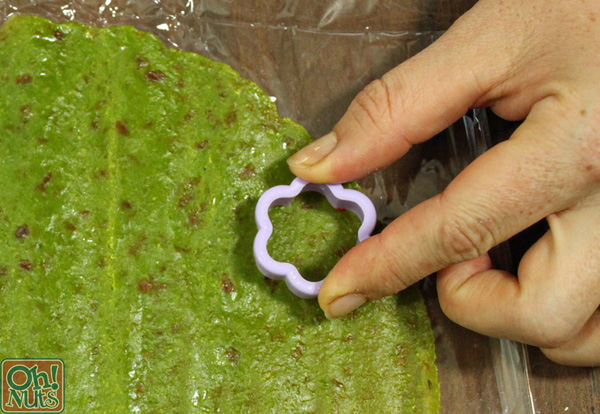
Use a small flower-shaped cookie cutter to cut flowers from the fruit leather rolls. You’ll need 8 flowers total—two per skull.
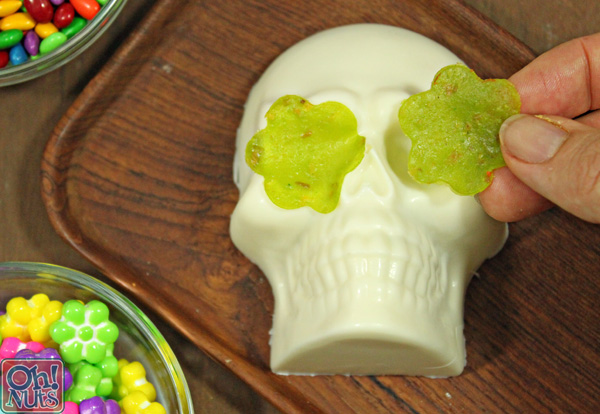
Pour some melted white chocolate coating into a paper cone, a piping bag fitted with a very small round tip, or even a plastic bag with a small hole snipped in the corner. Pipe some coating in the eyes of each skull, and press a fruit leather flower on top of each eye socket.
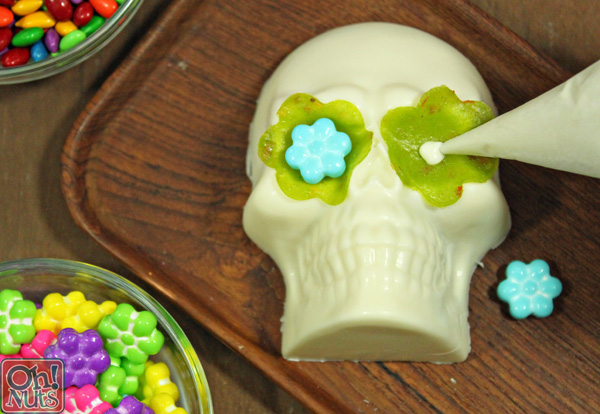
Add another dab of white into the center of each eye socket, and press a flower candy on top of that.
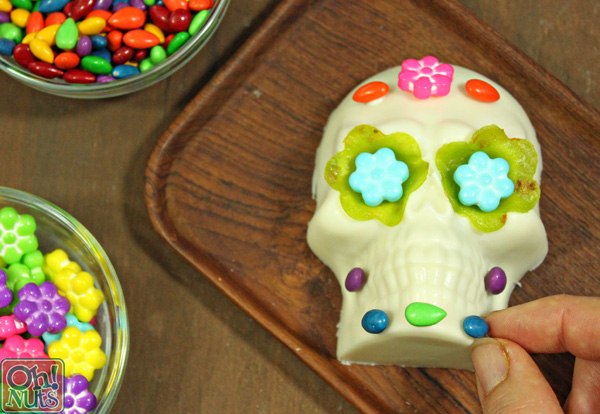
Continue to glue candy flowers and chocolate-covered sunflower seeds on top of the skull, using the white coating as glue. It helps to have a final design in mind when gluing the candies on, so take a minute to map out your design in your mind before you finish adding all the decorative touches.
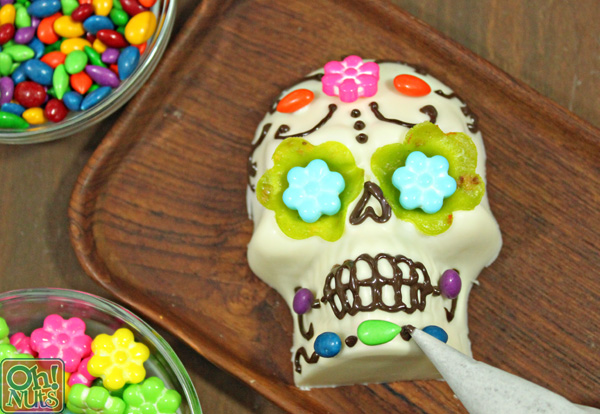
Melt the chocolate candy coating in a small bowl in the microwave, stirring after every 30 seconds. Transfer the melted chocolate coating into a paper cone, a piping bag fitted with a very small round tip, or even a plastic bag with a small hole snipped in the corner. (I think a paper cone gives the most control over the process).
Decorate the skull with melted chocolate accents: outline the nose, give the skull teeth, and add decorative swirls and dots until it looks just how you like. Refrigerate the skulls until the chocolate is completely set, about 15 minutes.
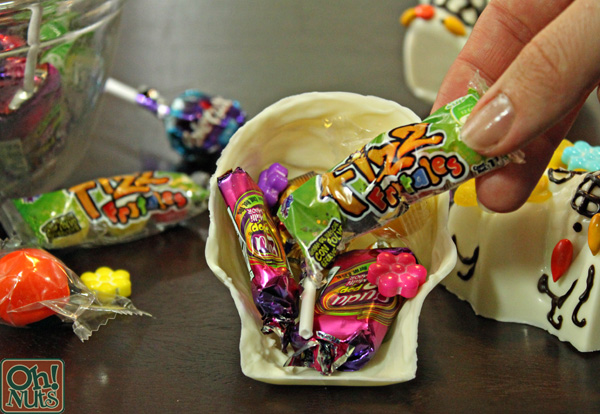
Fill the bottom portion of each skull with a few pieces of your favorite candy. I used a colorful assortment of popular Mexican candies, to go with the Dia de los Muertos theme, but any candies that will fit in your skull will work! You can also put other goodies inside, or even non-edible treats and party favors!
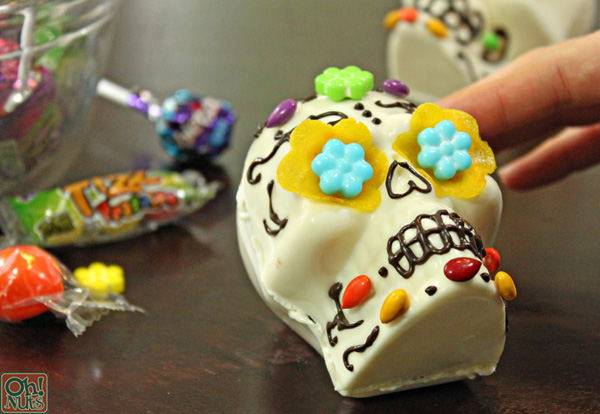
Pipe a line of melted white candy coating around the edge of the skull, and carefully put the top on. Run your finger along the edge to remove any excess coating and make it smooth.
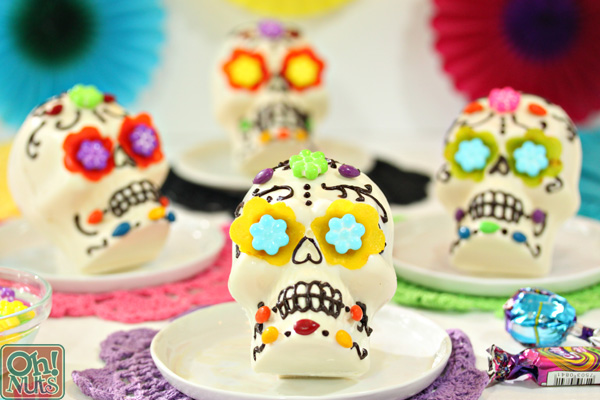
Once the coating sets and your pieces are firmly stuck together, you’re done! Serve these skulls at a Halloween or Day of the Dead party, or use them as edible table centerpieces or party decorations.
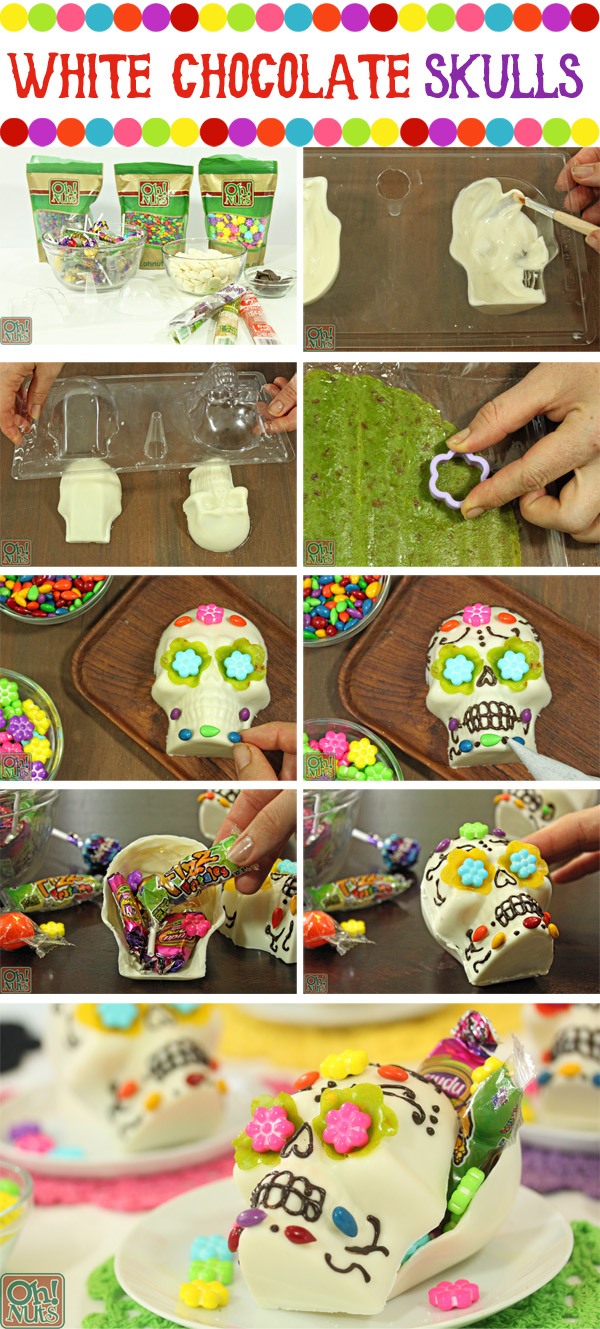
As always, there’s a pin-able image below with all the steps you’ll need to make these skulls. Enjoy!
All text and images (c) Elizabeth LaBau

