Candy Rainbow Cake
Spring is in the air, and I am beyond ready for it! I want sunny days, blue skies, fresh flowers, and bright and cheerful desserts. This Candy Rainbow Cake definitely fits the bill–it just might be the happiest thing I’ve seen all year! It’s fun, it’s delicious, and best of all, it’s super easy to make!
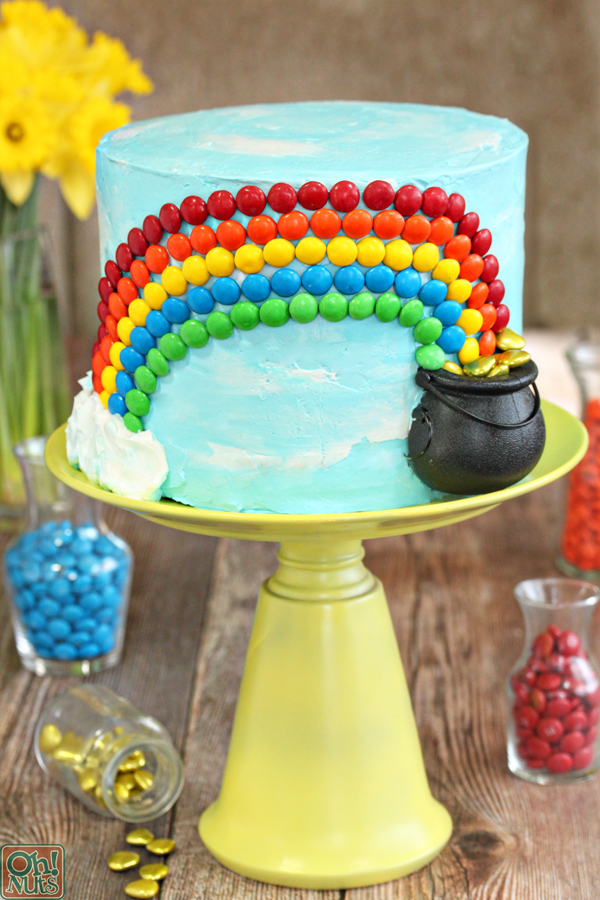
I originally envisioned this as a St. Patrick’s Day cake, and it definitely works for that–just check out the pot of gold at the end of the rainbow! But it also makes a perfect birthday party cake, and to be honest, it makes me so happy, this might become my new “just because” cake too. Here’s how you can make a Candy Rainbow Cake of your own:
Candy Rainbow Cake
yield: 8-inch, four-layer cake
Ingredients
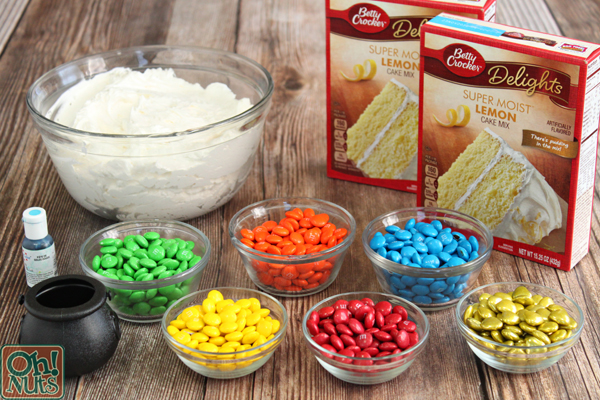
- 2 boxes cake mix, plus ingredients to make cakes
- 8-10 cups your favorite frosting (I like Swiss Meringue buttercream)
- Rainbow M&Ms or similar colorful candy
- Gold Metallic Amorini Hearts or similar gold candy
- Miniature candy kettle (optional)
- Sky blue food coloring
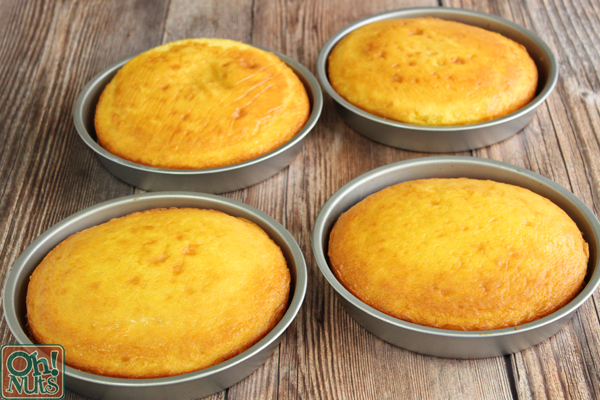
Preheat the oven to 350 F. Line four 8-inch cake pans with parchment circles, and spray the pans well with nonstick cooking spray.
Prepare the cake mixes according to the package directions, and divide the batter evenly between the four cake pans. (Each box of cake mix will make enough batter for 2 pans.) Bake the cakes in the preheated oven for 30-35 minutes, until a toothpick inserted into the center comes out with just a few moist crumbs attached. Cool the cakes completely before proceeding. They can be made in advance and kept, well-wrapped, in the freezer for up to several weeks.
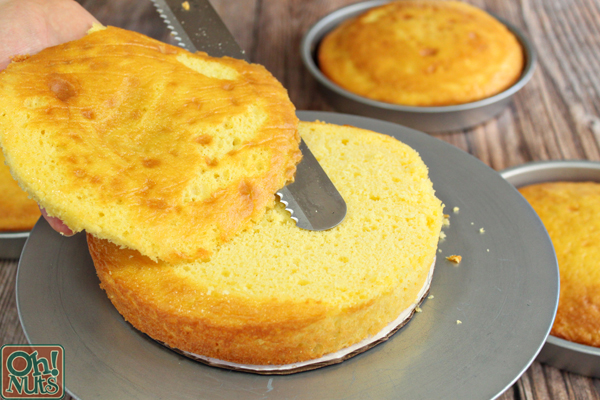
When you’re ready to assemble the cake, slice the rounded tops off of the cakes so that they are reasonably flat on top. This step is technically optional, but assembly will be easier if you’re working with mostly flat cakes. I like to use a long serrated knife, and gently saw at the side of the cake while turning it on a turntable.
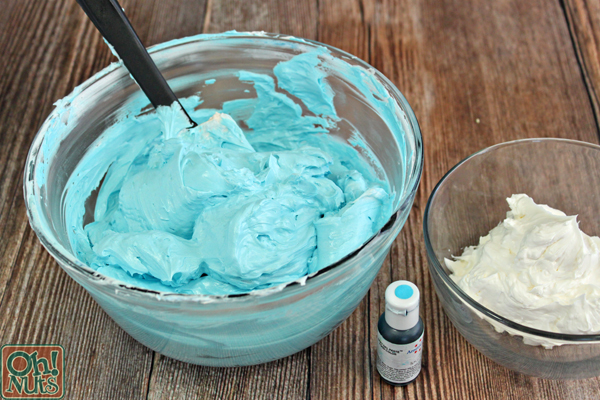
Set aside about 2/3 cup of white frosting and reserve it for a later use. Add a few drops of blue food coloring to the remaining frosting, and stir and adjust the coloring until you get a nice sky blue color.
A note here about the frosting: you can use your favorite buttercream recipe. I’m partial to Swiss Meringue (and here is how I make it!) but a traditional “American buttercream” made with butter and powdered sugar will work just as well. I don’t recommend using canned frosting for this–the frosting is usually too soft and doesn’t provide enough stability for tall layer cakes.
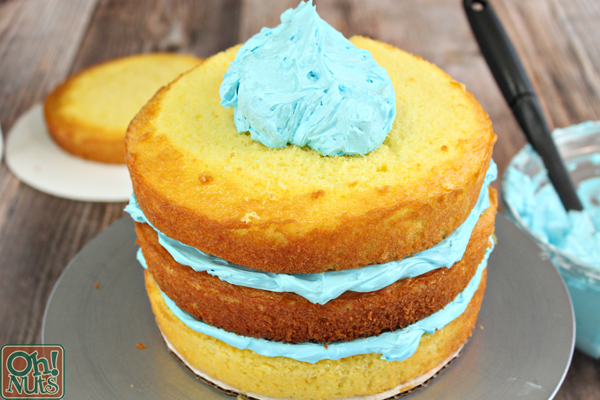
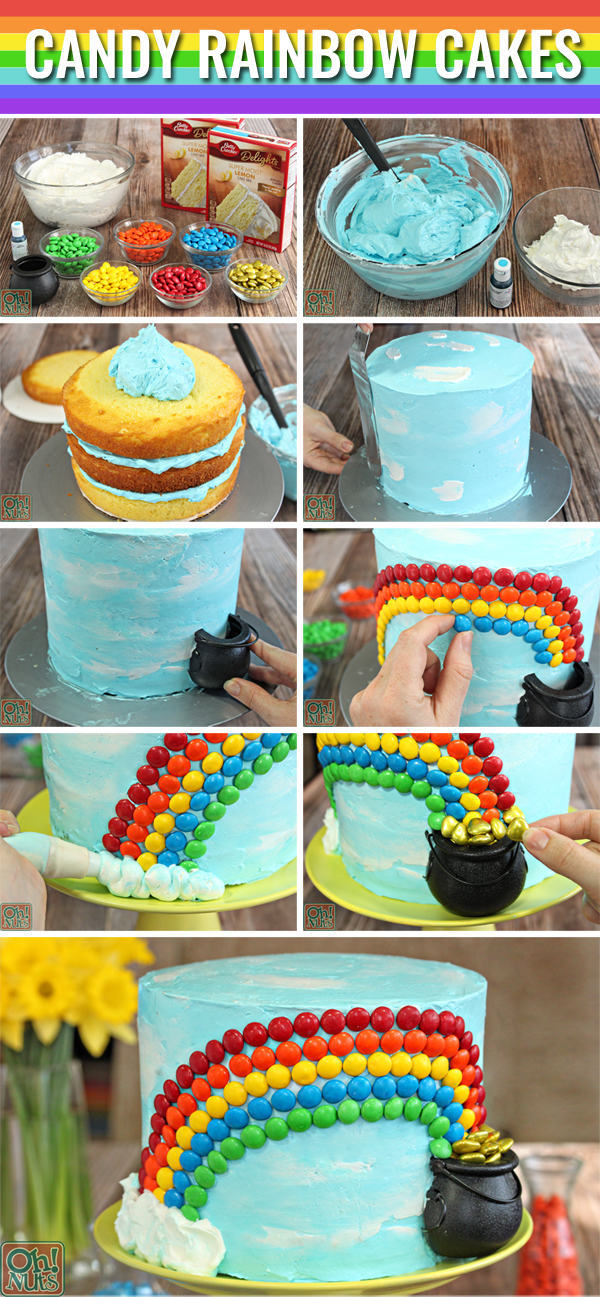
Place a cake round on a cardboard cake circle. Top it with about a cup of blue frosting, and spread the frosting out to the edges of the cake. Add a second layer, and continue layering cake and frosting until you have stacked four layers of cake.
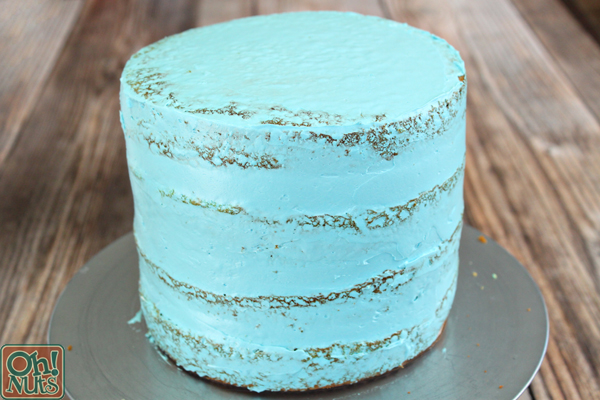
Spread a very thin layer of frosting over the entire outside of the cake. This is called a “crumb coat” and the purpose is to trap any crumbs so that they don’t get mixed into the frosting and make it lumpy. Don’t worry about it being pretty, and use as little frosting as possible. Refrigerate the cake until the crumb coat starts to get firm, about 20-30 minutes.
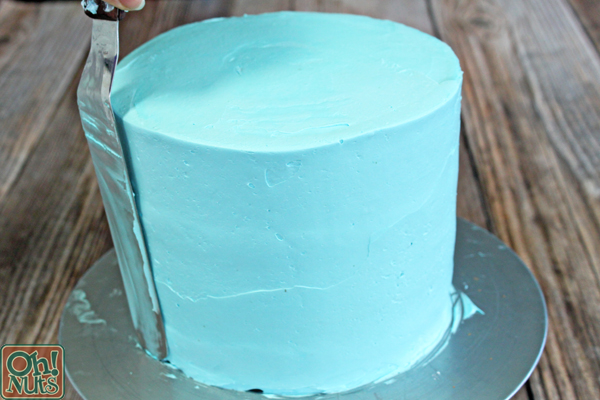
Spread a thicker layer of frosting all over the top and sides of the cake. I like to use a metal offset spatula to scrape the frosting smooth. It doesn’t have to be perfect, however, since we’re going for an organic clouds-in-the-sky look. You can even embrace a more textured finish if you have trouble smoothing out the frosting!
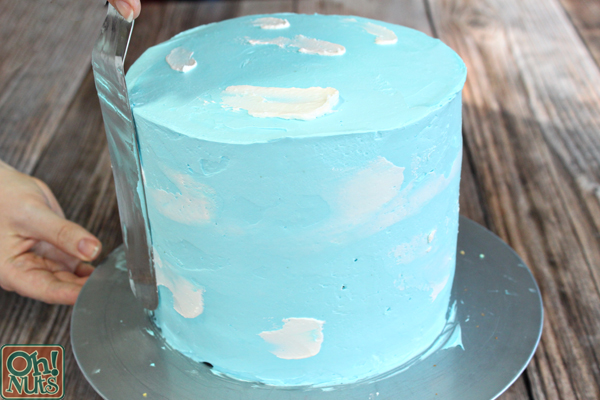
Take some of the reserved white frosting and smear random smudges of white on the top and sides of the cake. Run a spatula around the cake a few times, to smooth the white into the blue frosting and give it a hazy, cloudy appearance. Transfer the cake to your serving platter or cake stand for the finishing touches!
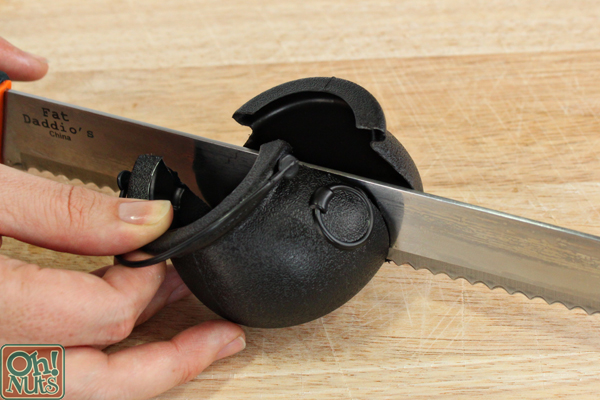
If you’re using a candy kettle in your cake design, cut it in half with a sharp serrated knife. The candy kettle is completely optional, of course. I found a set of small plastic novelty kettles on Amazon and thought they would make perfect pots for the gold, but if you don’t want to make a special purchase, the cake will still be just as cute!
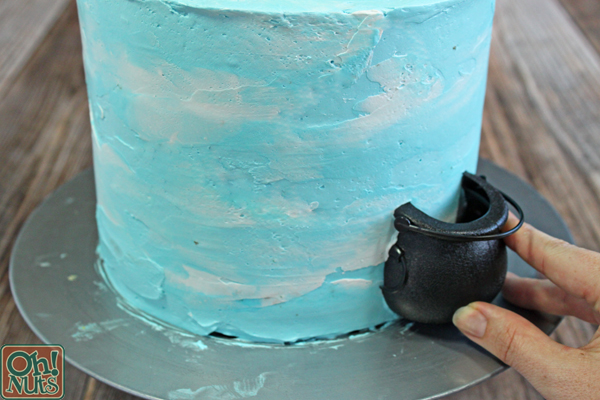
Press the kettle into the side of the cake, pushing it in far enough so that it’s firmly stuck in the frosting.
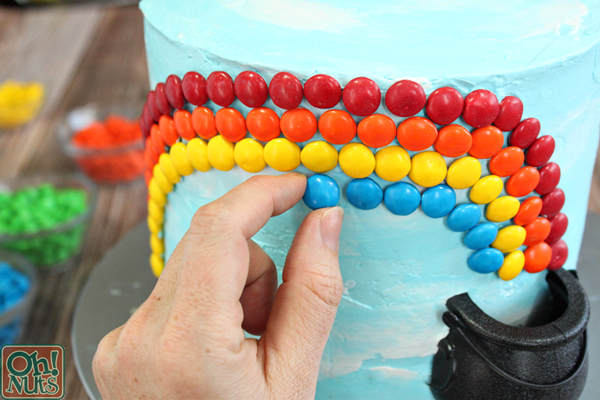
Separate the M&Ms by color. Press the M&Ms into the side of the cake in a rainbow shape and pattern. Have it begin at the lip of the candy kettle (if you’re using one) and arc to the bottom of the cake.
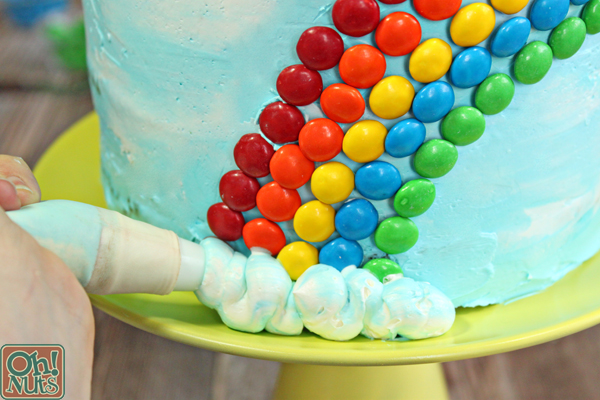
Transfer the remaining white frosting to a piping bag fitted with a large round tip, or put it in a plastic bag with a hole snipped in the corner. Pipe big, fluffy swoops of frosting clouds at the base of the rainbow. I added a few smears of blue frosting on the sides of the bag before I added the white frosting, to give the clouds a touch of blue along the edges.
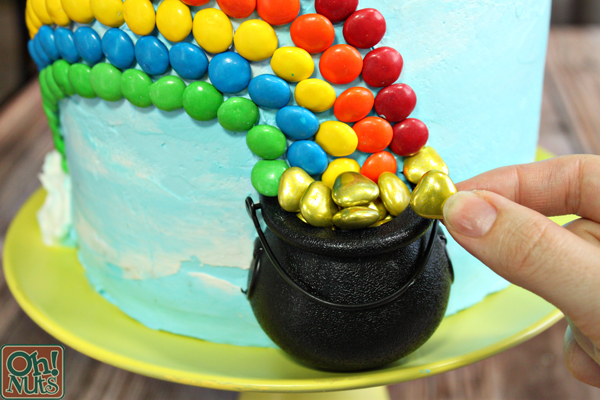
Finally, fill the candy kettle with gold candies. If you’re not using a kettle, then just pile them at the bottom of the rainbow. I love these Gold Metallic Amorini Hearts because they are SO shiny and metallic, but you can use any type of gold candies, including Sixlets or Rolos.
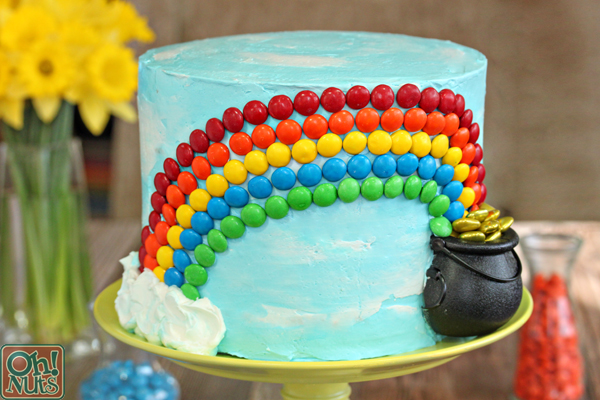
Your cake is now ready to be served–if you can even bring yourself to cut into such a cute dessert! As always, there’s an easily printable recipe and pin-able image below. Enjoy, and happy spring!
- 2 boxes cake mix, plus ingredients to make cakes
- 8-10 cups your favorite frosting (I like Swiss Meringue buttercream)
- Rainbow M&Ms or similar colorful candy
- Gold Metallic Amorini Hearts or similar gold candy
- Miniature candy kettle (optional)
- Sky blue food coloring
- Preheat the oven to 350 F. Line four 8-inch cake pans with parchment circles, and spray the pans well with nonstick cooking spray.
- Prepare the cake mixes according to the package directions, and divide the batter evenly between the four cake pans. (Each box of cake mix will make enough batter for 2 pans.) Bake the cakes in the preheated oven for 30-35 minutes, until a toothpick inserted into the center comes out with just a few moist crumbs attached.
- Cool the cakes completely before proceeding. When you're ready to assemble the cake, slice the rounded tops off of the cakes so that they are reasonably flat on top. No need to be perfect, but assembly will be easier if you're working with mostly flat cakes.
- Set aside about ⅔ cup of white frosting and reserve it for a later use. Add a few drops of blue food coloring to the remaining frosting, and stir and adjust the coloring until you get a nice sky blue color.
- Place a cake round on a cardboard cake circle. Top it with about a cup of blue frosting, and spread the frosting out to the edges of the cake. Add a second layer, and continue layering cake and frosting until you have four layers of cake.
- Spread a very thin layer of frosting over the entire outside of the cake. This is called a "crumb coat" and the purpose is to trap any crumbs so that they don't get mixed into the frosting and make it lumpy. Refrigerate the cake until the crumb coat starts to get firm, about 20-30 minutes.
- Spread a thicker layer of frosting all over the top and sides of the cake. I like to use a metal offset spatula to scrape the frosting smooth. It doesn't have to be perfect, however, since we're going for an organic clouds-in-the-sky look. You can even embrace a more textured finish if you have trouble smoothing out the frosting!
- Take some of the reserved white frosting and smear random smudges of white on the top and sides of the cake. Run a spatula around the cake a few times, to smooth the white into the blue frosting and give it a hazy, cloudy appearance. Transfer the cake to your serving platter or cake stand.
- If you're using a candy kettle in your cake design, cut it in half with a sharp serrated knife. Press one half into the side of the cake, at the bottom.
- Separate the M&Ms by color. Press the M&Ms into the side of the cake in a rainbow shape and pattern. Have it begin at the lip of the candy kettle (if you're using one) and arc to the bottom of the cake.
- Transfer the remaining white frosting to a piping bag fitted with a large round tip, or put it in a plastic bag with a hole snipped in the corner. Pipe big, fluffy swoops of frosting clouds at the base of the rainbow.
- Finally, fill the candy kettle with gold candies. If you're not using a kettle, then just pile them at the bottom of the rainbow. Your cake is now ready to serve!
All text and images (c) Elizabeth LaBau


