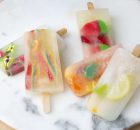
Passover DIY Chocolate Bars !
Passover is hard enough – with all the cleaning and running around finding lost Chometz in your house – cooking and baking can be challenging. Passover sweets are great and can be delicious as well! Here we are going to show you how to make your very own chocolate bars, it is very easy and could be a fun activity for you and the little ones.
You can customize these bars in any way you want – from toppings to fillings – these are two option that could get you started, but the sky is the limit for these bars.
We used a chocolate bar mold, but you can DIY this in any way – find a container, or create your own to hold the chocolate in any shape or size you wish.
Ingredients
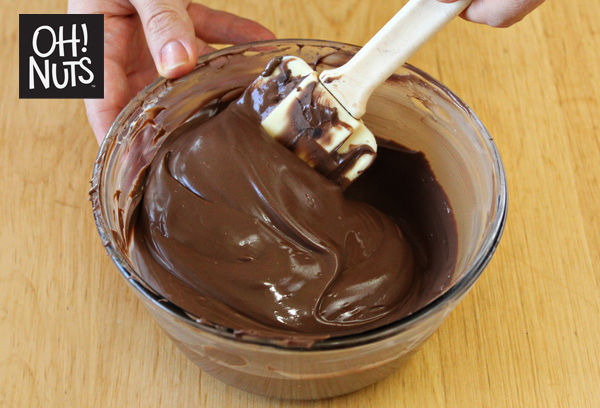
Your first step will be to temper your chocolate. To do so you need to use the “Double boiler method” by putting it in a glass bowl above a pot full of boiling water and stir continuously. This process with both melt your chocolate and will also make your chocolate easy to work with and have a beautiful shine once it’s cool.
Completely fill your chocolate bar mold and tap it on the counter to make sure there are no air bubble. Then, empty the chocolate back in to the bowl, this will be your chocolate shell. Make sure you are are covering the sides of the mold to make the bar strong and keep the filling inside the bar. Once you are done – pop it in the fridge until firm to the touch.
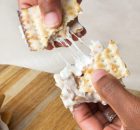
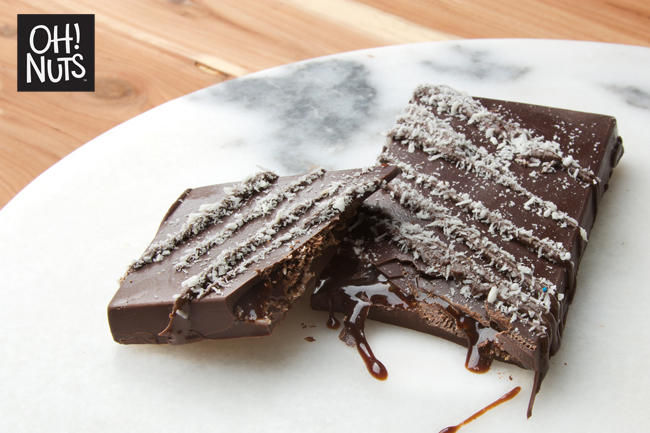
We are now ready for our fillings! For these bars we choose to make a crunchy jam and chopped nuts bar and a chocolate coconut bar.
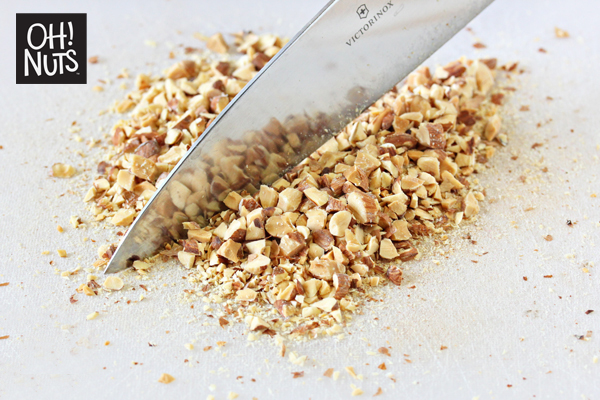
Let’s start with our tangy nut chocolate bar. Chop up the honey glazed almonds (You can use any type of almond or any type of nuts. We choose honey glazed for a crunchy sweet touch).
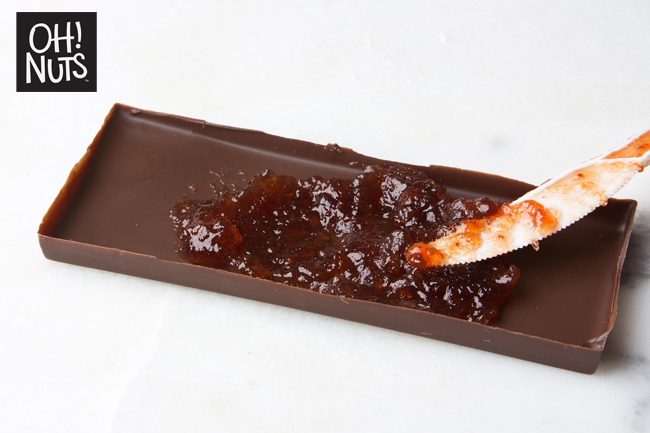
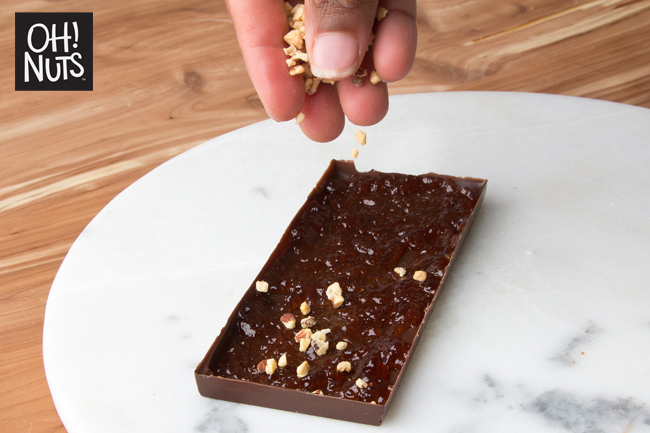
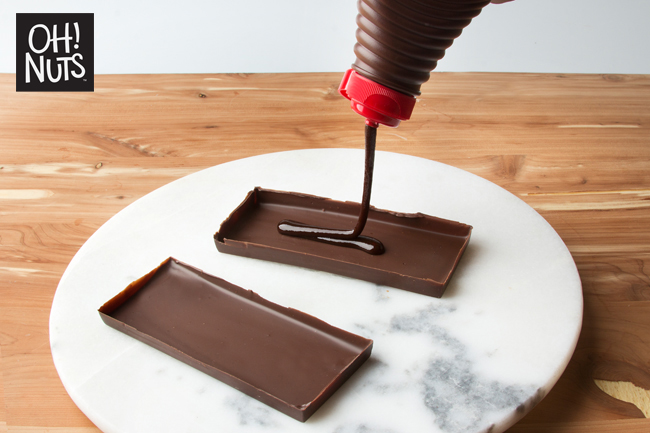
As our Jam is all ready to eat – we can just pop it open and it’s ready to use! We are now going to fill our bars. Spread the jam inside the bar, making sure you spread it evenly but don’t over fill it. Make sure the layer of jam is thin and then you can top it with your chopped nuts.
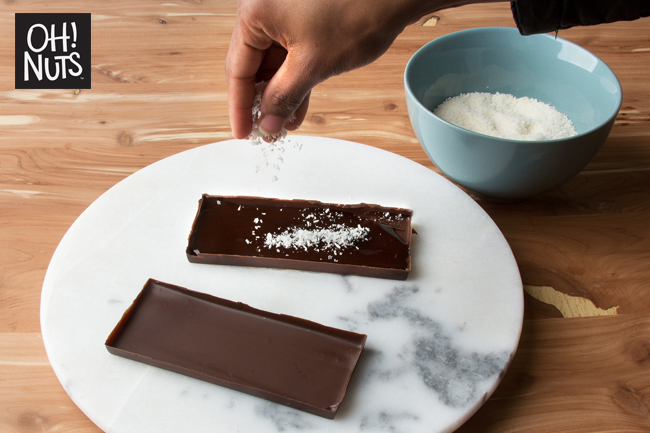
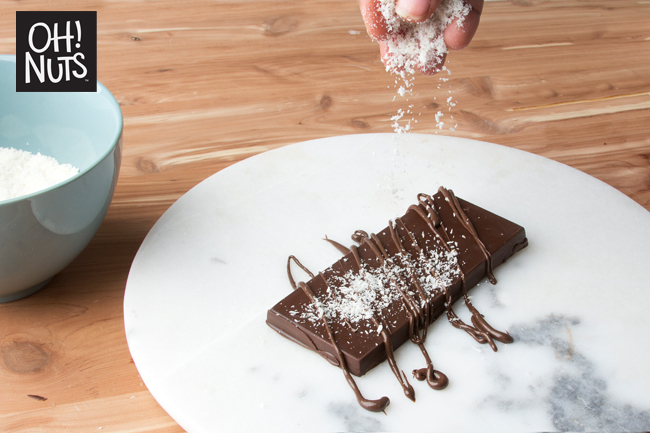
For our second bar, lets go ahead and do the same thing! This time, drizzle the chocolate syrup inside the bar, making a smooth and thin layer of syrup and top it with fresh shredded coconut.
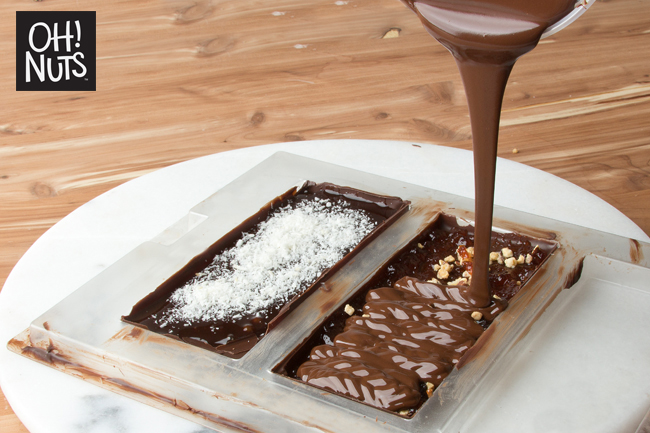
Now it is time to seal the bars up with more chocolate! Put the chocolate in a container and pour it over covering all the toppings and fillings. Make sure to seal the bar, spread the chocolate around to make sure you do not leave any open spots that the filling might drip out from. Give it gentle tap on the counter to make the chocolate smooth. Once you are done put your bars in the fridge until firm.
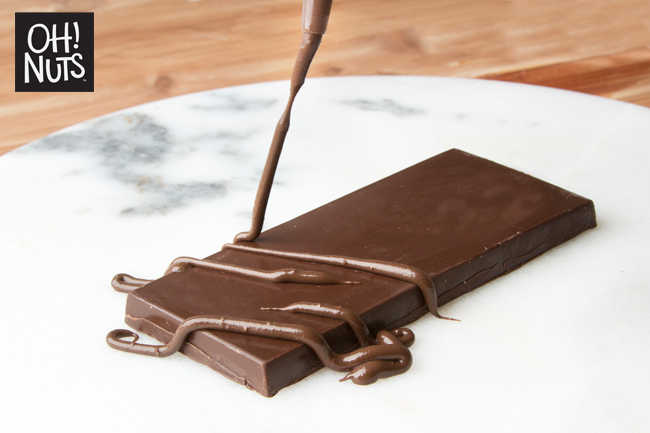
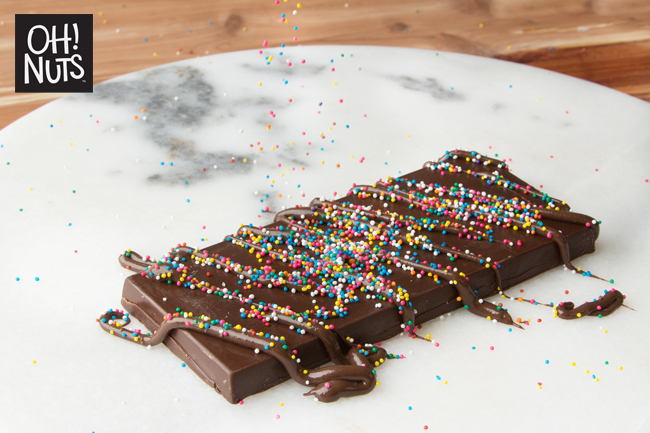
Now the fun part! Decorations! We choose to have a chocolate drizzle and have our toppings on top of that – this gave us a nice zig zag patterns and made a clean line of topping. You can have fun with this part and decorate as you wish.
As always, there’s an easily printable recipe down below. Enjoy, and happy Passover!
- Alprose Swiss Baking Chocolate
- Passover Assorted Nonpariels
- Passover Chocolate Syrup
- Passover Cherry Preserve
- 1LB Passover Shredded Coconut
- 1LB Passover Honey Glazed Almonds
- Melt chocolate by putting it in a glass bowl above a pot of boiling water. This will both melt your chocolate and also make it easy to use and have a nice shine at the end.
- Pour the melted chocolate in to your chocolate bar mold. If you don't have a mold you can use any plastic or glass container that you find that will fit your needs. You want to fill the mold completely and pour the excess chocolate back in to the bowl.
- Let the chocolate cool in your fridge until firm.
- Chop honey glazed passover almonds and store aside.
- Take chocolate bars out of the fridge.
- Add your filling. You can use any filling you find fit. Make sure to have a thin and even spread and to cover all sides of the bar.
- Add your toppings: coconut or chopped nuts. Make sure topping are also evenly across the bar.
- Pour the rest of the chocolate on top of the filling. Make sure to cover all the sides of the bar and to not leave any holes or the filling will pour out. Tap the mold around to make the chocolate smooth.
- Put your bars back in the fridge until firm.
- Once bars are out, drizzle chocolate on top of the bar, in any shape or pattern you desire. While chocolate is still wet, sprinkle your toppings. Remove any excess topping to reveal a beautiful chocolate bar.
- Cool and let set until ready to serve.