Halloween Petit Fours
I keep trying to start this post with a clever introduction, but about halfway through any sentence, I want to stop and type-shout, “Who cares about that, LOOK AT HOW CUTE THESE PETIT FOURS ARE!” It’s kind of hard to concentrate on anything else when there are adorably decorated cake bites in the room, is all I’m saying.
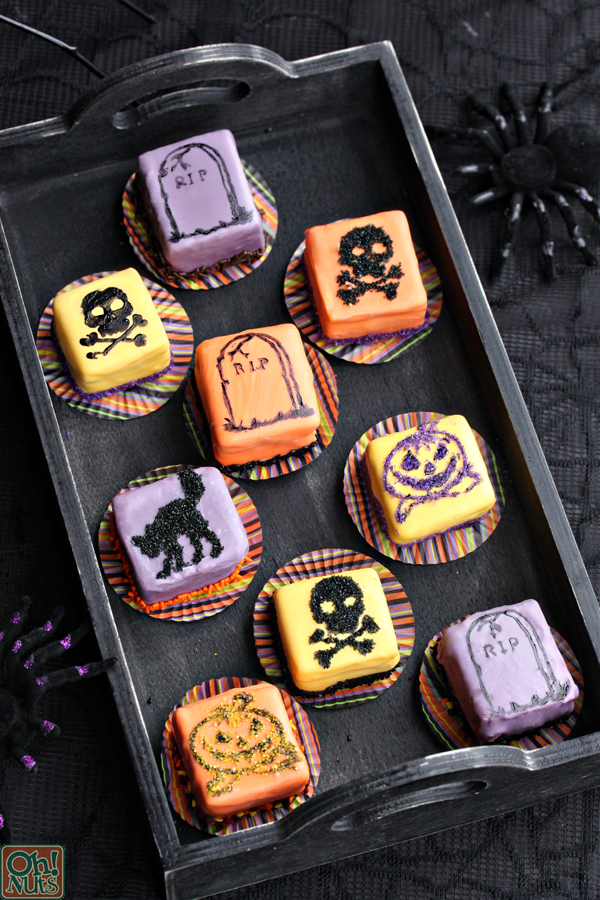
Besides, you don’t care what I think about pumpkin spice lattes, or sweater weather, or carving pumpkins. You’re here for the food, and you’re in luck, because this food is goooooood. These petit fours have actually zoomed to the top of the list of my favorite holiday desserts! I love everything about them–their bright colors, their bold patterns, and oh yeah, the fact that they’re filled with pound cake, frosting, and jam! Could there be anything better?
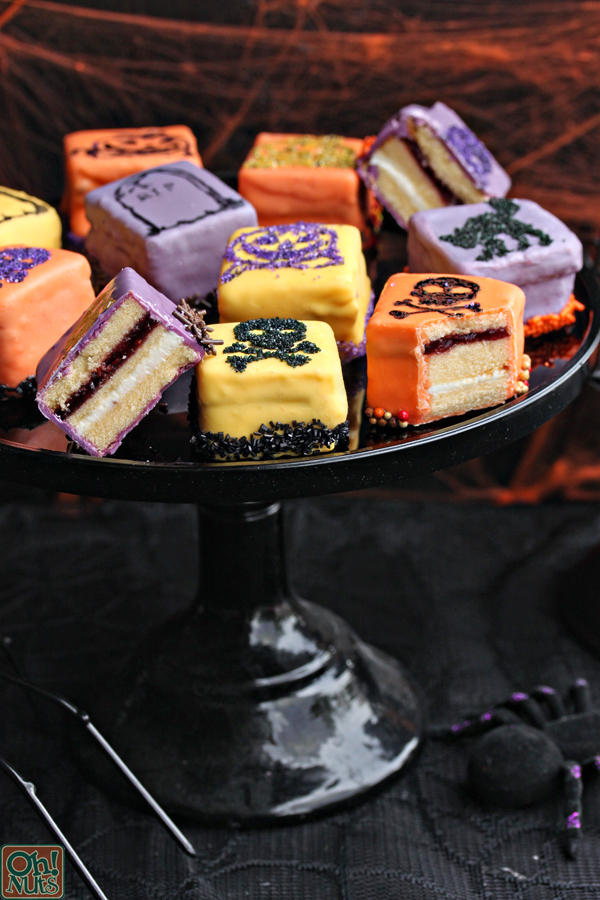
These little two-bite wonders are made with store-bought everything–cake, and frosting, and jam! You could definitely go the DIY route here, but you’ll be spending enough time decorating them, I figure we should simplify whenever we can. Besides, something about combining moist cake, sweet frosting, and tart jam totally elevates all of the elements, and makes them all taste much better than they do on their own. I shared these with a large group of people, and no one could believe they were made from such simple, common ingredients–they look and taste so gourmet!
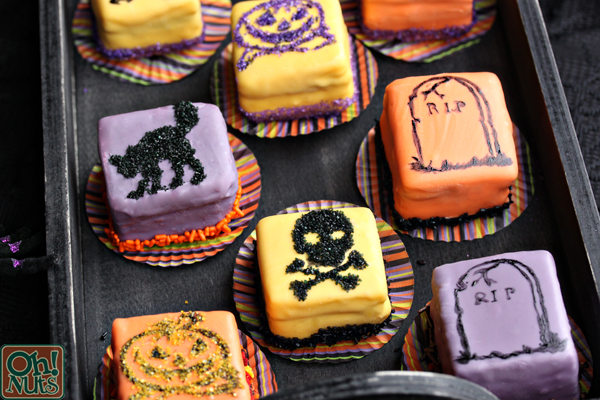
You might be wondering about the decorations, and about how long you’re going to spend painstaking hand-drawing each design on top of the petit fours. You might be cursing my name already. Oh no, dear reader, I’ve got your back, and I’ve got an awesome trick for decorating these quickly and easily. What’s my secret weapon? Read on…
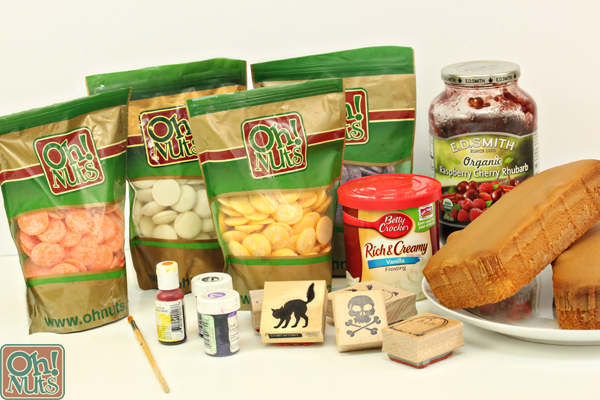
Ingredients
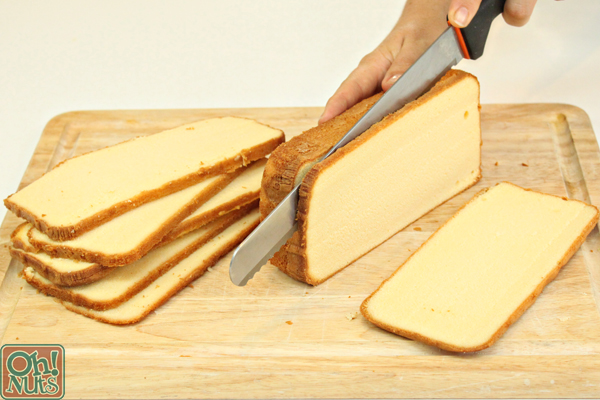
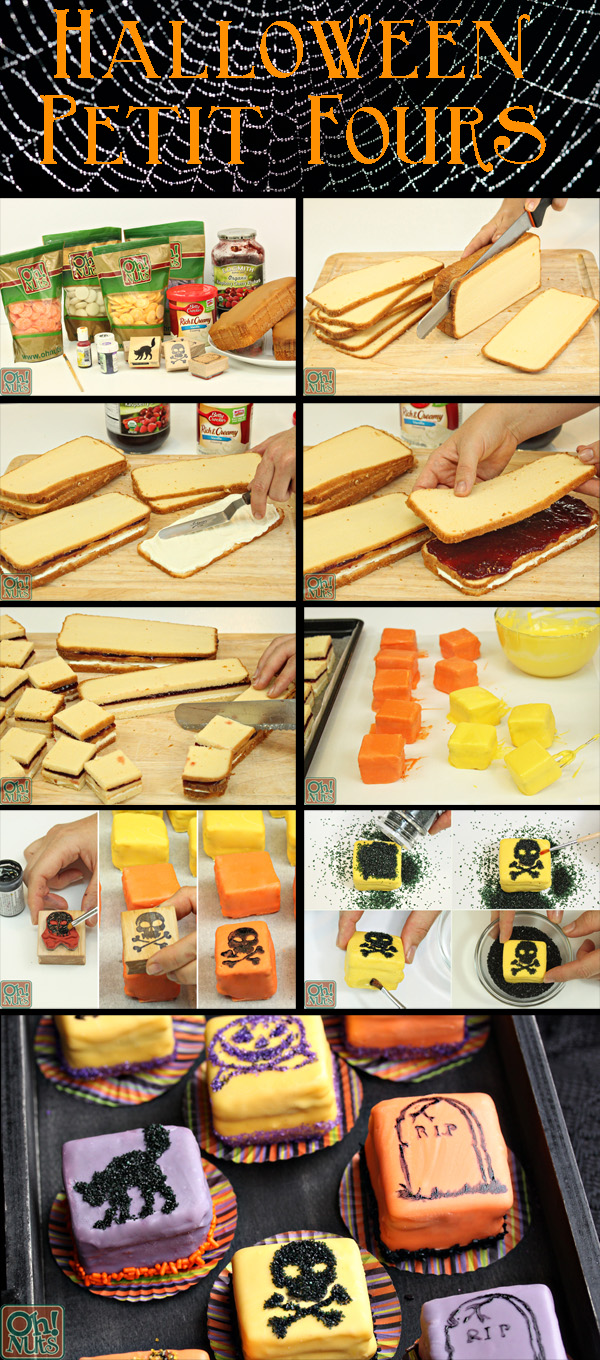
Use a large serrated knife to slice each pound cake into 5 thin slices lengthwise. I found it easiest to cut the cake when it was still partially frozen (but not rock-hard), and to set the cake on its side and cut downward to make the slices. Try to get them as even as possible, but don’t stress if a few are thicker or thinner than the others.
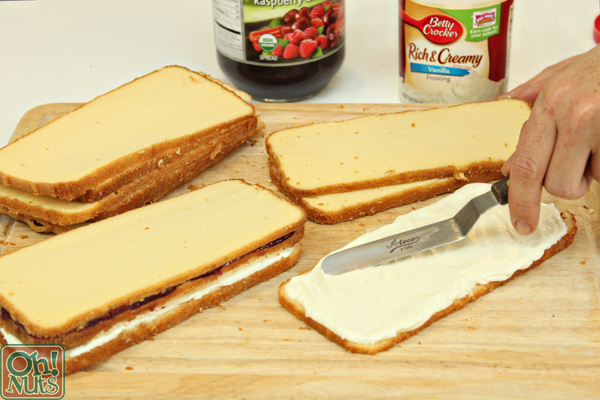
Spread a thick layer of frosting on one of the cake layers, spreading it all the way out to the edges.
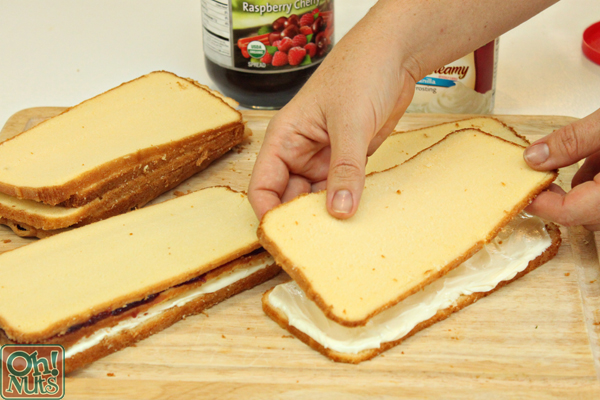
Top the first cake layer with a second, lining up the edges as much as possible. Spread a layer of raspberry jam on top of the second cake slice. Finally, place a third cake slice on top of the others.
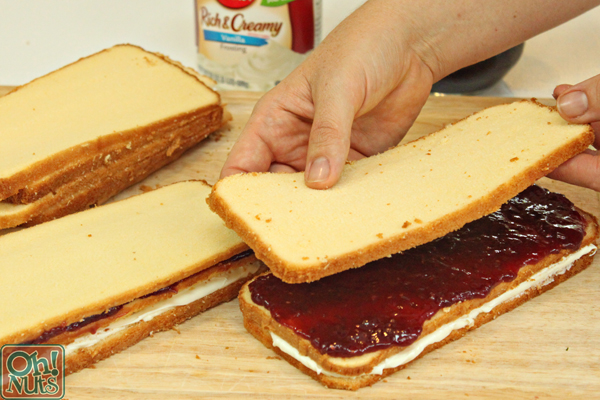
Repeat this process to make a second cake stack. You will be left with two slices of pound cake—cut them in half so that you have four squares of cake, and use three of them to make one more (smaller, square) cake stack. Eat or discard the remaining cake square.
Freeze the cakes for about 30 minutes, until they’re fairly firm—it’s easiest to get clean cuts if the cakes are semi-frozen.
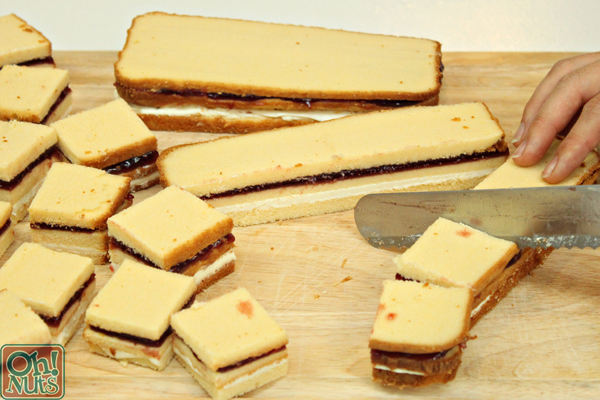
Use a large serrated knife to cut each cake stack in half lengthwise, then cut each cake strip into 5 squares. You should keep in mind the size of your stamps, and adjust the size of the squares you cut if necessary.
Once the squares are cut, return them to the freezer while you prepare the candy coatings. Place each color in a separate bowl, and melt them in the microwave in 30-second increments, stirring after every 30 seconds to prevent overheating. Melt and stir each color until it is smooth and fluid.
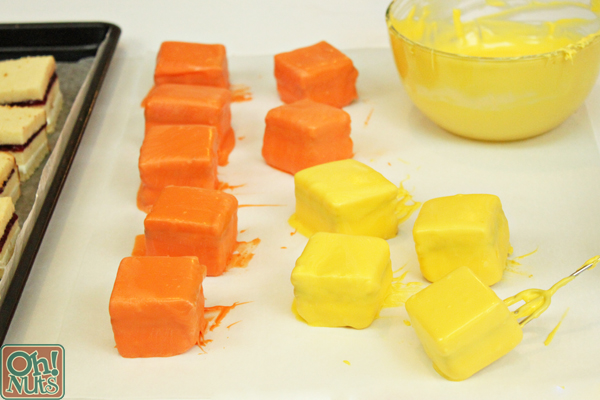
Once the coatings are ready, cover your work surface with waxed paper or parchment paper. Take the petit fours out of the freezer, and use a fork or dipping tools to dip a square in the melted coating. Remove it from the coating and let the excess drip back into the bowl, then scrape the bottom against the lip of the bowl. Set it down on the waxed paper and slide the fork out from underneath.
Repeat until all of the petit fours are dipped. The cold temperature of the cake might make the coating get thicker faster, so reheat in the microwave as necessary to keep it fluid. Let the petit fours sit until the coating has set.
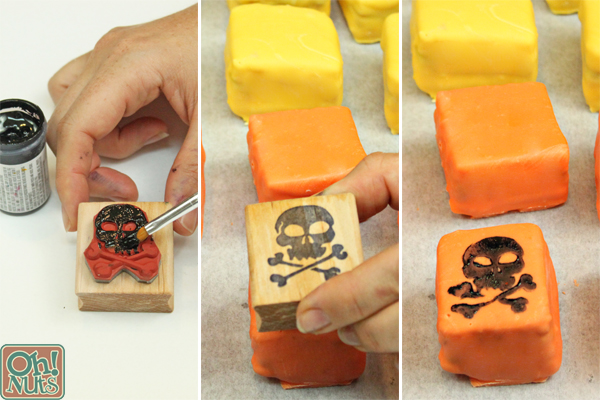
Here’s where things are going to get good–decoration time!
To decorate them, paint black gel food coloring on a clean rubber stamp using a clean paintbrush. (You don’t have to use black, but in general I found that darker colors worked better than lighter ones.)
Gently press the stamp on top of a petit four—I found it easiest to do almost a rolling motion, starting from one edge and gradually pushing the whole thing down. Be gentle, since if you press too hard you’ll crack the candy coating. The stamp won’t transfer well if the surface is uneven, so if you run into a few bumpy petit fours, you can embrace the imperfection, or use a small paintbrush to touch up any rough spots.
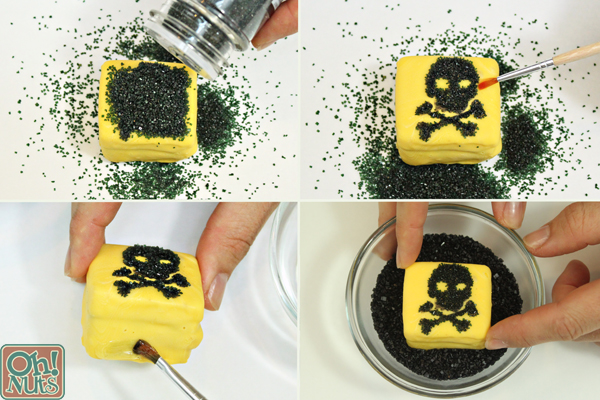
After all of the petit fours are stamped, let the food coloring dry for several hours, or else they might smear if you’re not careful when handling them. If you want to decorate them with sugar, you don’t have to wait for the coloring to dry—you can pour sparkling sugar right on top of the petit four! The sugar will stick to the food coloring, and you can use a small paintbrush to brush it off of the surrounding areas.
To add a finishing touch around the bottom of the desserts, paint a thin layer of corn syrup around the bottom edge. Pour sprinkles into a bowl, and push the petit fours down into the sprinkles so they adhere to the corn syrup.
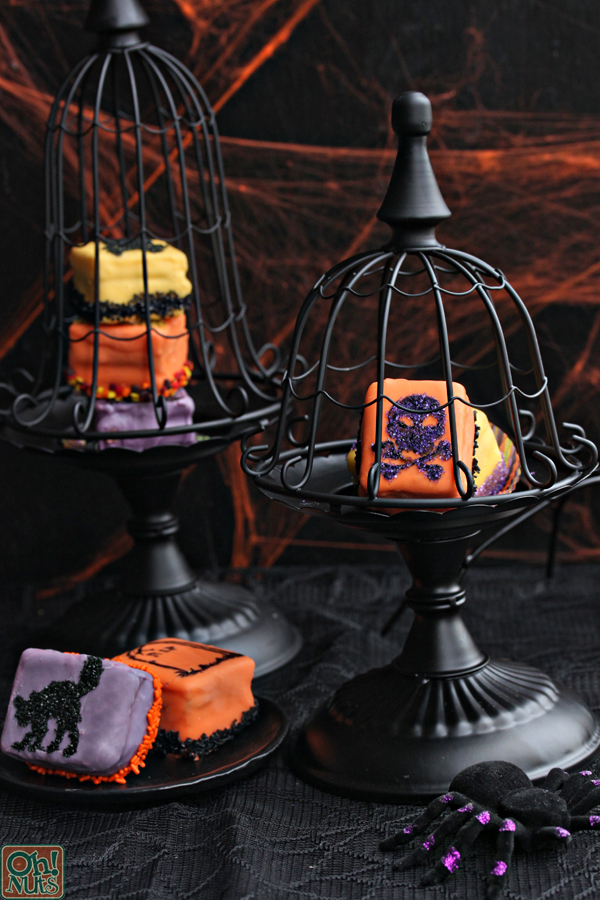
Store Halloween Petit Fours in an airtight container in the refrigerator for up to a week. For the best taste and texture, let them come to room temperature before serving.
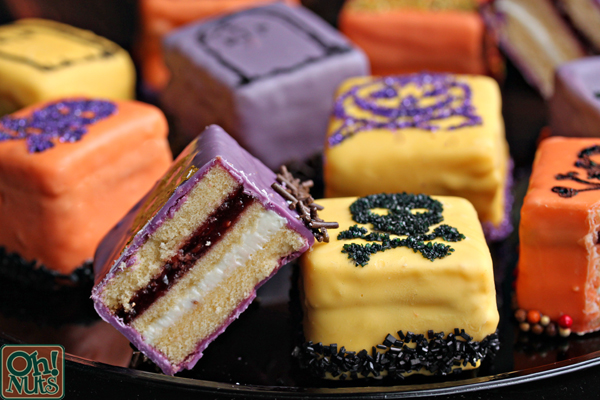
…and that’s it! Making these petit fours isn’t so scary, right? With a little help from a few rubber stamps, you’ll be churning out cute designs in no time. Enjoy, and as always, there’s an easy pin-able image right below. Happy feasting!
All text and images (c) Elizabeth LaBau

