Chocolate Valentine’s Day Cupcake Toppers
Valentine’s Day is the best for many reasons. It’s an excuse to tell people how much you love them! It’s a holiday full of adorable heart and cupid imagery! But if we’re begin honest, we all know the REAL reason Valentine’s Day is the best: the candy.

These adorable Valentine’s Day cupcake toppers combine everything that’s fun about the holiday: red and pink colors, cute heart shapes, and yes, CANDY! They are entirely edible, so after you get done oohing and aahing over how totes adorbs they are, you can chomp on them to your heart’s content. They’re made from candy wafers, so they taste like lightly vanilla-scented white chocolate. In a word, they’re delicious.
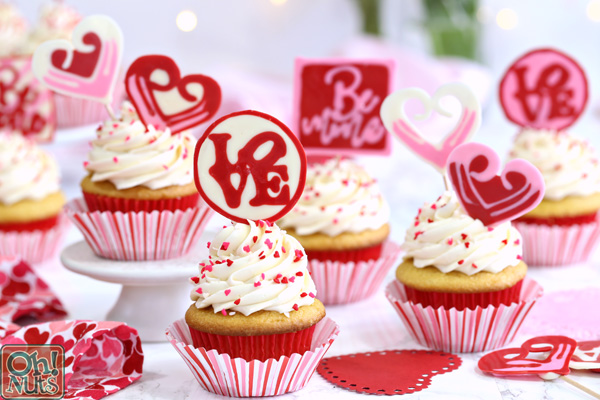
Even better, they’re totally customizable! You can make any shape, pattern, or word(s) that you want! Spell out someone’s name, leave a sweet message, heck–you can even propose to someone with these! I’ve also included my own template in case you want to make these “Be Mine” or “Love” cupcakes just like I did. But really, you can be as creative as you want.
Here’s everything you’ll need to get started:
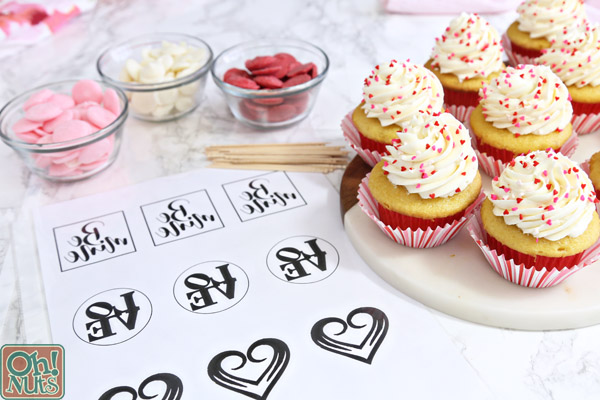
Chocolate Valentine’s Day Cupcake Toppers
Yield: 24 cupcakes
Ingredients
- 4 oz red melting chocolate wafers
- 4 oz pink melting chocolate wafers
- 4 oz white melting chocolate wafers
- Piping bags fitted with small round tips (I used #2 tips)
- Template of your choice
- Plastic sheet protectors (optional) or waxed paper
- 24 long toothpicks or lollipop sticks
- Frosted cupcakes
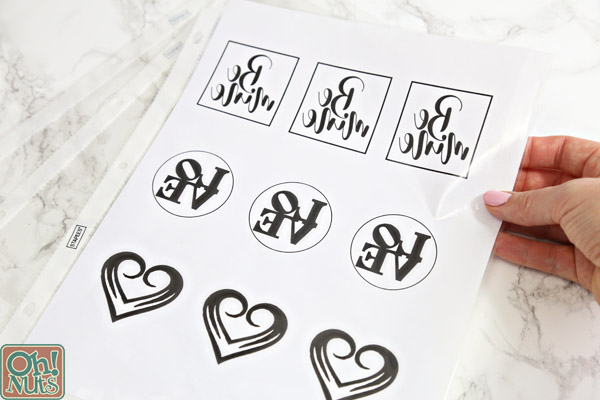
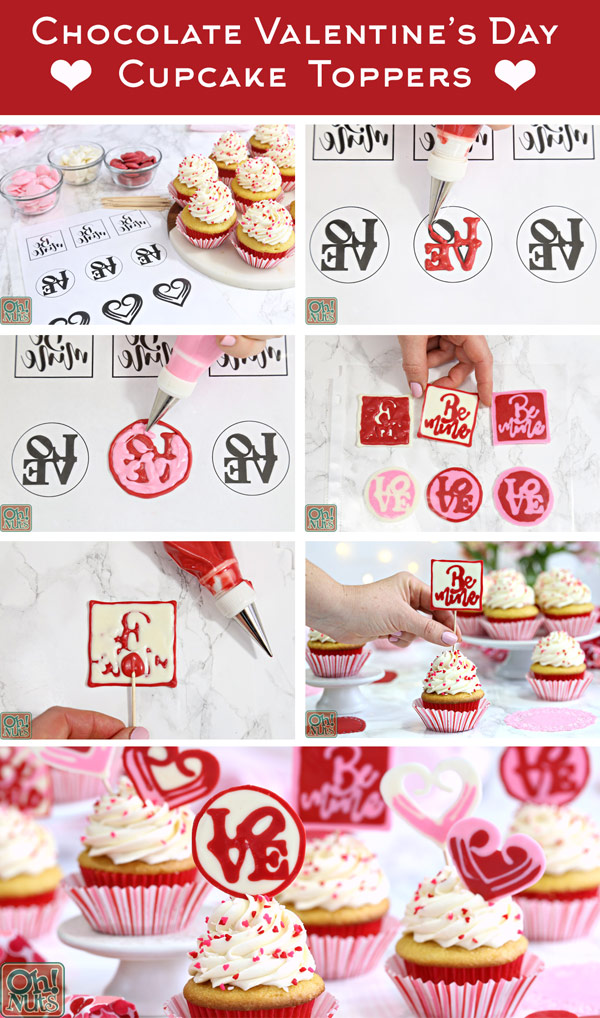
First, let’s talk about the template you’re going to use! You might notice that mine looks a little funny–that’s because I’ve reversed the designs with words so that they’re backwards. With chocolate piping, the bottom of the design always ends up being much smoother than the top. So I prefer to work with a reversed image, to make it easier to get a pretty, shiny, legible chocolate topper.
Of course, if you’re just doing hearts or other shapes, reversing the design doesn’t matter. But if you’re doing words, I do recommend flipping it and tracing them backwards. If you want to use my template, you can download it right here! If you want to make your own, image programs like Photoshop (paid) and Picmonkey (free) can easily flip your designs. You can also go the DIY route and hand-draw your template, then trace over it with a dark marker, so that it’s visible from the other side of the paper. All good options!
The other thing to note about this technique is my new favorite hack: using page protectors! Just slip the template into a (new! clean!) plastic sheet protector, and trace right on it. When you’re done, you can slip the template back out and put the plastic sheet in the fridge to chill while you repeat the process again and again. It’s much easier than my old method of using waxed paper over the template–but if waxed paper is what you have, then that’ll work too.
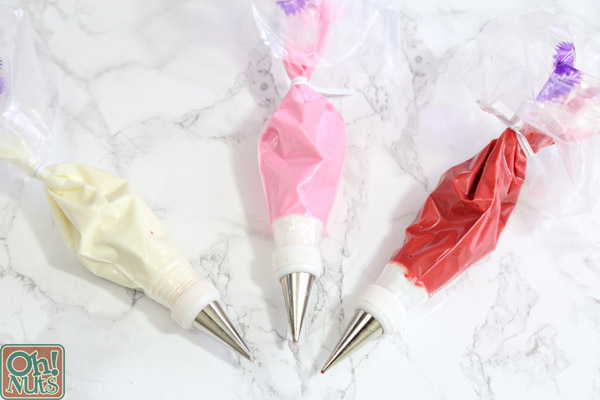
So melt each color of candy coating in its own bowl in the microwave, stirring until it’s smooth and fluid. Transfer it to a piping bag fitted with a small round tip (I used a #2 tip for my designs–I wouldn’t go any larger if you’re trying for any sort of detail.)
Usually I say that a plastic bag with a hole cut out of the corner is a good piping bag substitute, but not this time. For this kind of work, you need a level of precision that a hole cut in a plastic bag just can’t provide. If you don’t have access to piping bags and tips, I would instead recommend making parchment paper cones (tutorial here), which will get you a fairly sharp tip that you can do detailed work with.
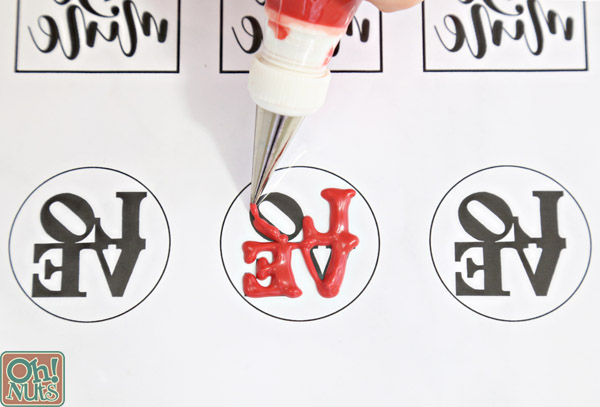
Begin tracing your design with one of the colors. Try not to squeeze too much, and just let the colors flow slowly out of the tip. The great thing about using the sheet protectors is that if you do make a mistake, it’s easy to wipe off and try again!
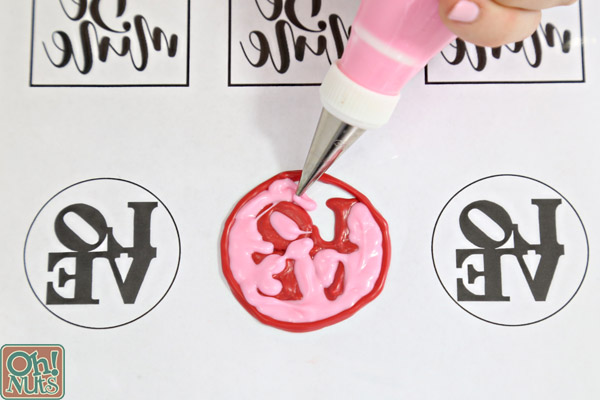
After you’ve finished with one of the colors, go back and fill in the black space with another color (or two!). You can also try to add patterns and designs like polka dots and stripes. You can wait until the first color is set before you add the second, but as long as you’re careful not to smear the colors together with the piping bag tip, waiting isn’t necessary.
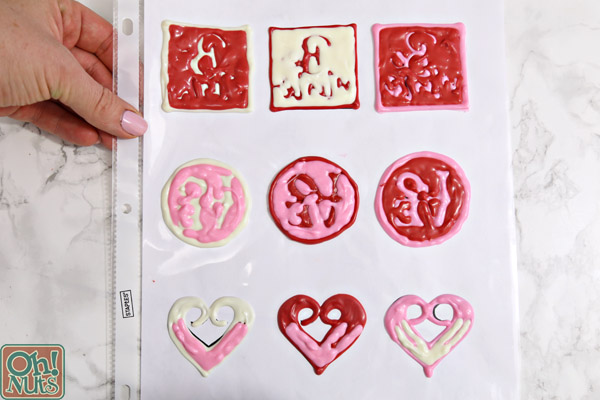
Repeat until all of the designs are colored in. Take the paper template out of the sheet protector, carefully slide the plastic sheet onto a baking sheet, and refrigerate it to set the coating while you repeat the tracing process as many times as you need to! I recommend making a few extra toppers, just because if you don’t you’re sure to have breakage. (And if you do, you won’t need them…rule of the universe!)
To keep the coating from hardening while you’re tracing the designs, you can rest them on a heating pad, set to the lowest setting. The gentle heat from the heating pad should keep the coating fluid enough to work with.
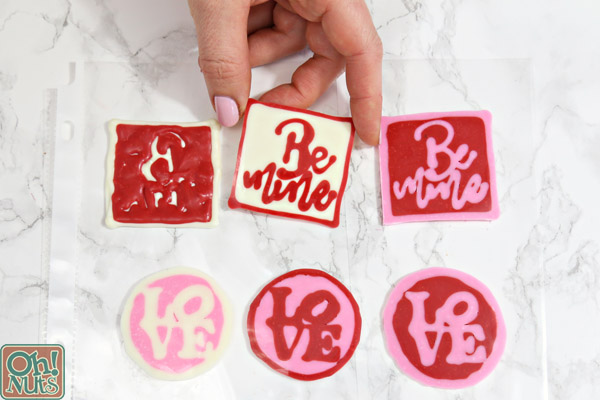
Once the toppers are completely set, gently peel them away from the plastic and MARVEL at how talented you are. So pretty and shiny!
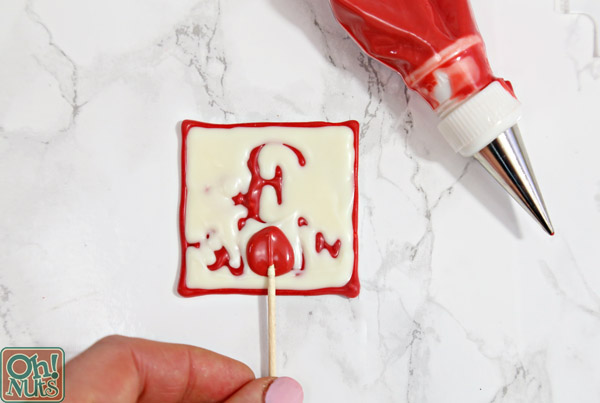
To affix them to the toothpicks, pipe a blob of melted coating on the back of each topper, and firmly press a toothpick into the coating, turning it all around so it’s completely covered. Let it set again completely before using.
Note that I’m using extra-long toothpicks. You probably don’t want to use regular-length toothpicks, they won’t give you much room to work with. If you can’t find long ones, wooden skewers cut down to size or lollipop sticks are both good options as well.
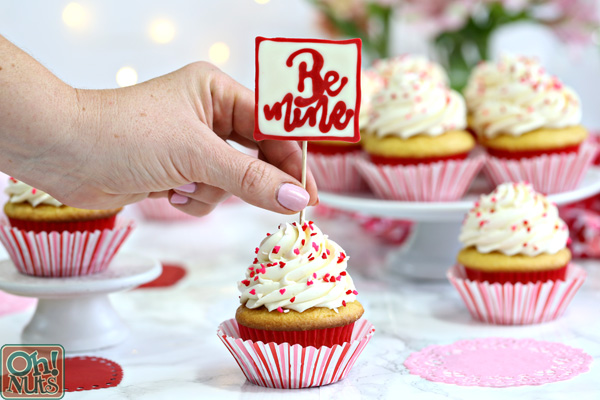
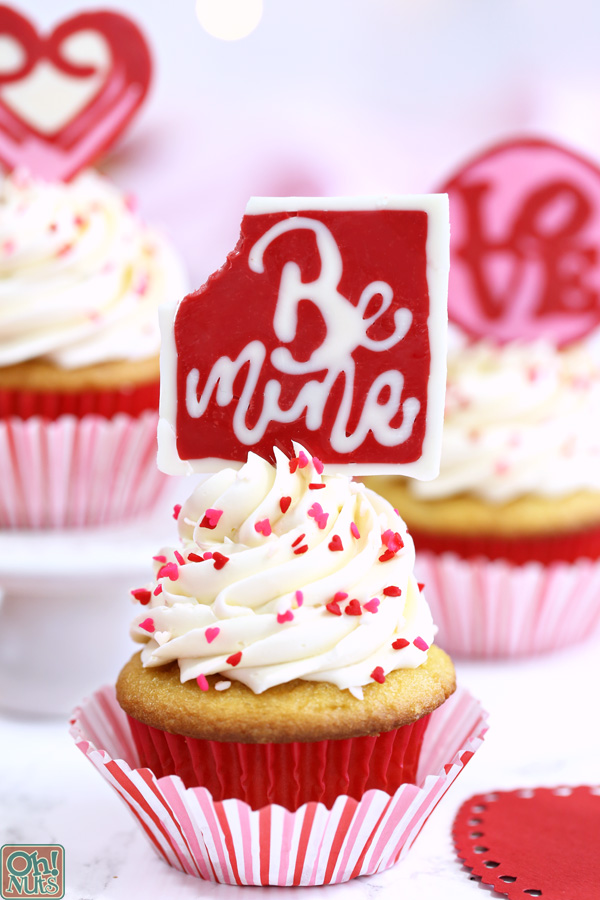
Finally, stick your toppers into your cupcakes! Voila! They are finished, and they look adorable.
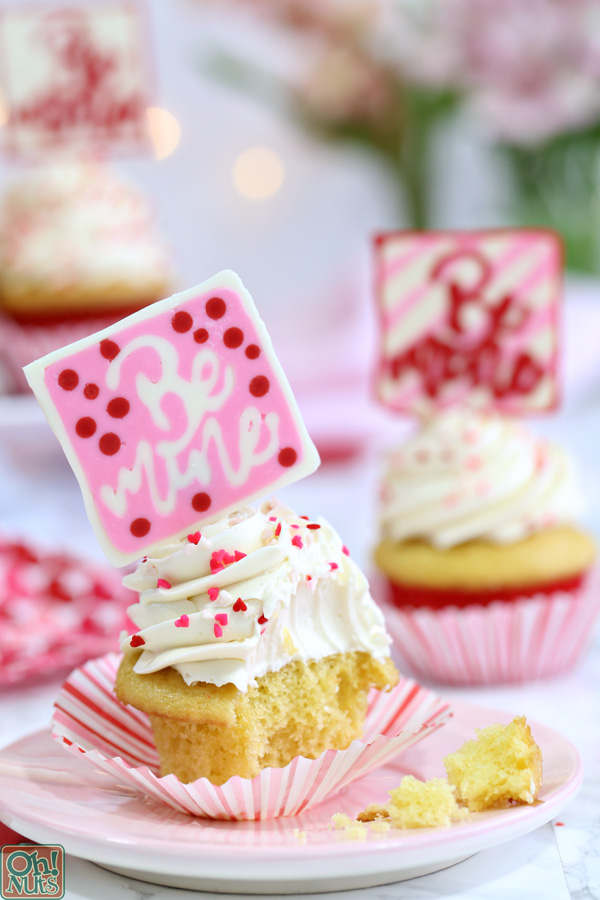
These chocolate Valentine’s Day cupcake toppers keep very well, so they can be made several weeks in advance. Just store them in a cool, dry place, with waxed paper or parchment between the layers so they don’t get scuffed. It’s probably easier to store them before you affix the toothpicks, but either way will work.
As always, there’s an easily printable recipe and pin-able image down below. Enjoy, and Happy Valentine’s Day!

- 4 oz red melting chocolate wafers
- 4 ozpink melting chocolate wafers
- 4 oz white melting chocolate wafers
- Piping bags fitted with small round tips (I used #2 tips)
- Template of your choice
- Plastic sheet protectors (optional) or waxed paper
- 24 long toothpicks or lollipop sticks
- Frosted cupcakes
- Melt each color of chocolate wafer separately in a small bowl in the microwave. Microwave each for 30 seconds at a time, stirring well after each heating session, until the wafers are melted and smooth.
- Transfer each color into its own piping bag fitted with a small round tip.
- Place the template inside a plastic sheet protector, or alternately, tape a strip of waxed paper on your work surface and slide the template under the waxed paper.
- Trace the designs on the template with the melted candy coating. If the coating starts to harden in the bags, you can turn a heating pad to low and set the bags on the heating pad to keep the coating melted and fluid.
- Once you’ve traced all of the designs, slide the template out from the sheet protector, put the protector on a baking sheet, and refrigerate it to let the coating harden while you repeat the process as many times as you need to.
- One the designs are set, they can be peeled off the plastic sheet protector and stored until you’re ready to use them. To affix them to the toothpicks, place a large dot of melted coating on the back of each topper, and firmly press a long toothpick or lollipop stick into the coating, turning it so it’s completely covered.
- Once the coating is set and the toothpick is firmly in place, stick the toppers on your frosted cupcakes and you’re ready to serve them!
All text and images (c) Elizabeth LaBau


